¶ Introduction
The Object Storage Extension 3.1 has been released on on June 27th, 2024.
VMware Cloud Director Object Storage Extension 3.1 | 27 JUN 2024 | Build 24042320
- This is the 1st GA upgrade (from v3.0) supporting the VMware Cloud Director Object Storage Extension Solution Add-On Deployment
¶ What's New
VMware Cloud Director Object Storage Extension version 3.1 includes the following new features:
- MinIO Support
Service providers can prepare a MinIO cluster in an external Kubernetes cluster, then use the VMware Cloud Director Object Storage Extension deployment flow to provision the MinIO integration in VMware Cloud Director. - Client IP Forwarding
You can forward the VMware Cloud Director Object Storage Extension API client IPs to the underlying storage platform. You can use client IP forwarding by bucket owners to define client IP allow or deny policies on buckets. Client IP forwarding is not activated by default and it depends on the storage platform's capability to accept forwarded client IPs. - Kubernetes Backup and Restore Enhancement
VMware Cloud Director Object Storage extension refreshes the Kubernetes Backup and Restore UI, provides more details of individual backups and restores, and it simplifies the states and transition for Kubernetes backup. - OSIS Enhancement
VMware Cloud Director Object Storage Extension's OSIS (Object Storage Interoperability Service) now supports the S3-compliant storage vendors which assign tenant specific S3 endpoints for newly created storage tenants. OSIS also allows to onboard storage tenants in an asynchronous manner. - This release resolves CVE-2024-22276.
For more information on this vulnerability and its impact on VMware by Broadcom products, see VMSA-2024-0015.
Source: VMware Cloud Director Object Storage Extension 3.1 Release Notes
¶ Upgrading OSE to Version 3.1
1. Download the VMware Cloud Director Object Storage Extension 3.1 Everything ISO
vmware-vcd-ose-3.1.0-24042320-everything.iso(703.6 MB)2. Access your VCD as the System Administrator (Provider Account)
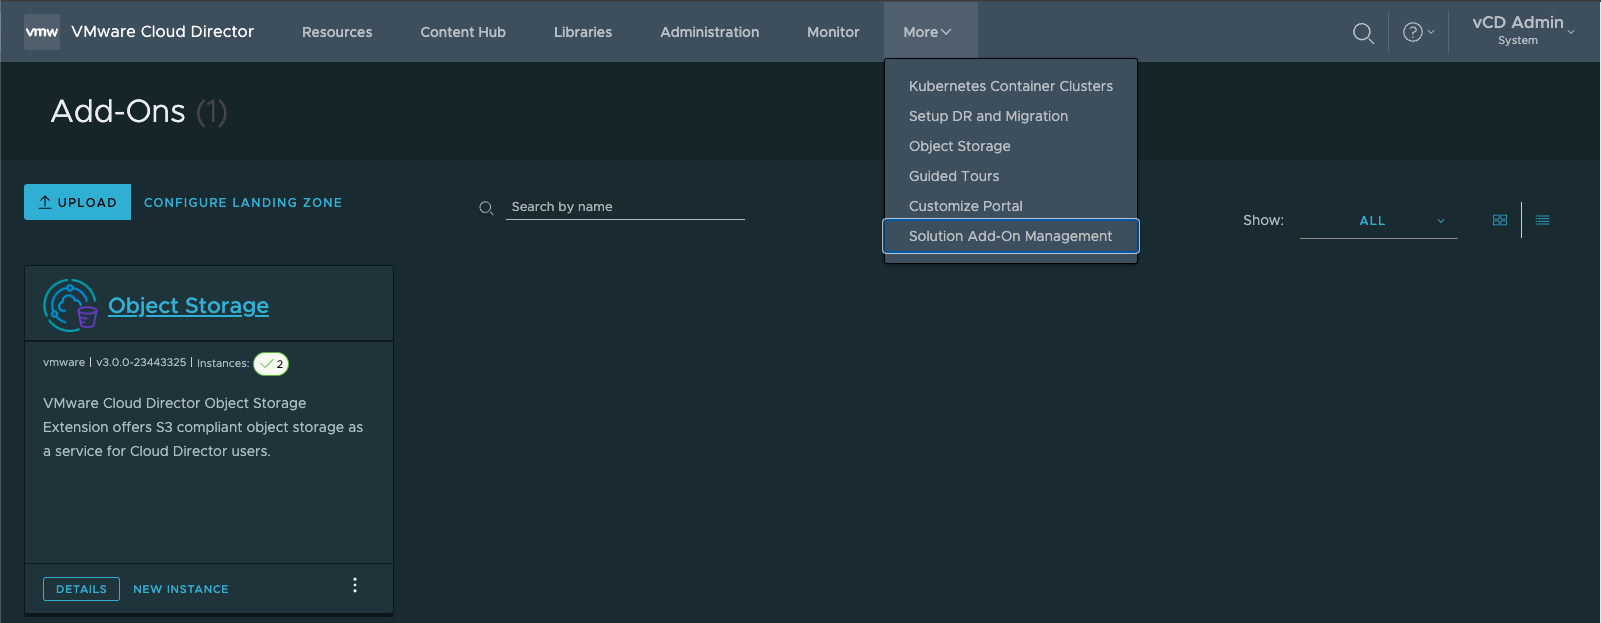
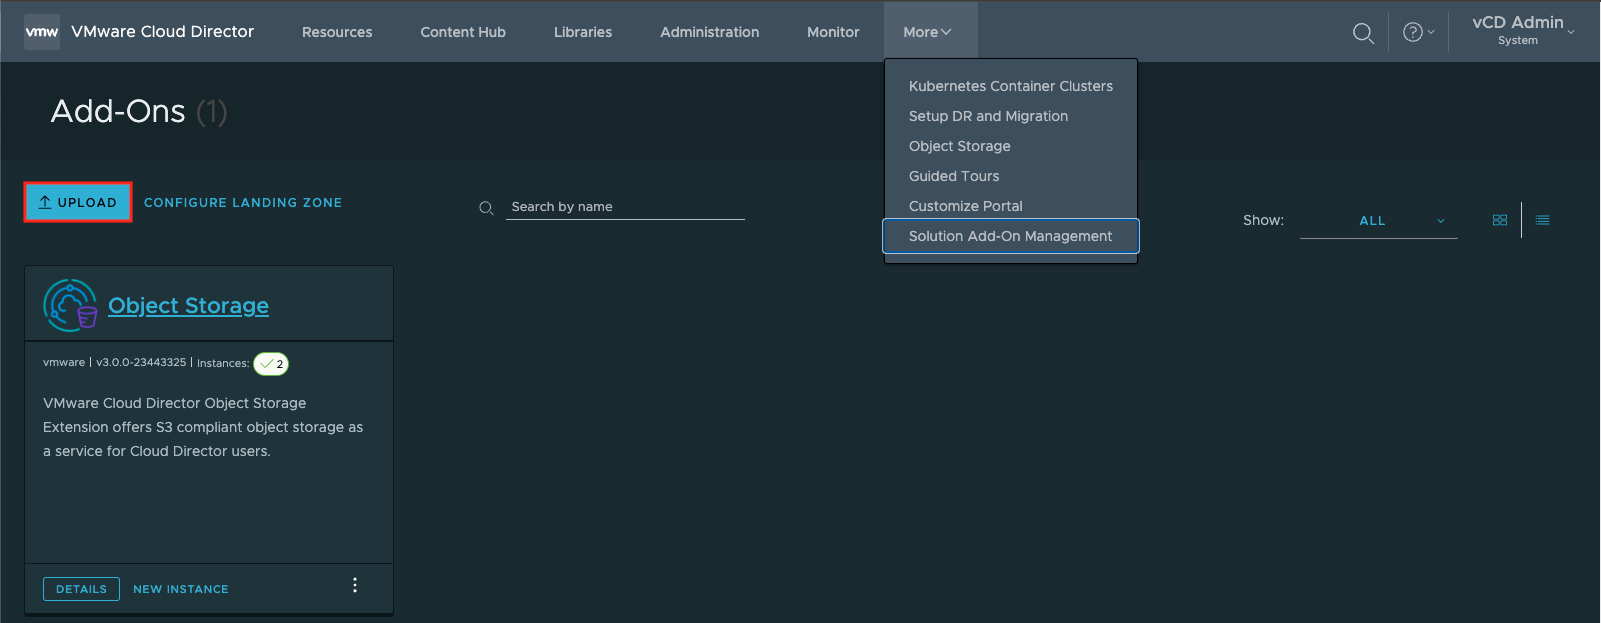
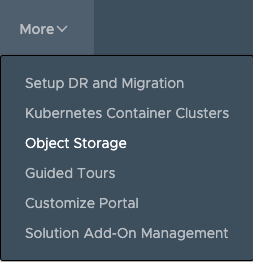
3. Go to More > Solution Add-On Management
4. In the Solution Add-On Management Extension, select UPLOAD
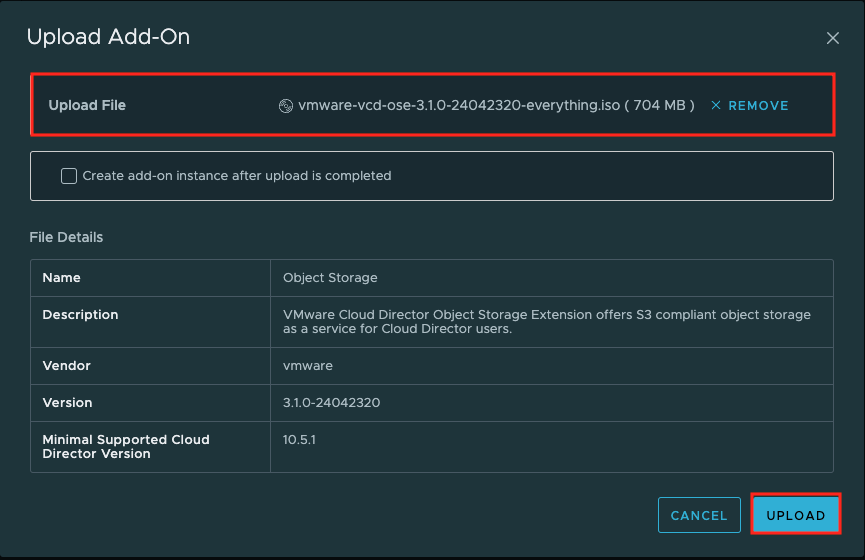
5. Upload the vmware-vcd-ose-3.1.0-24042320-everything.iso
6. Select UPLOAD after VCD parses the metadata info corresponding to the ISO.
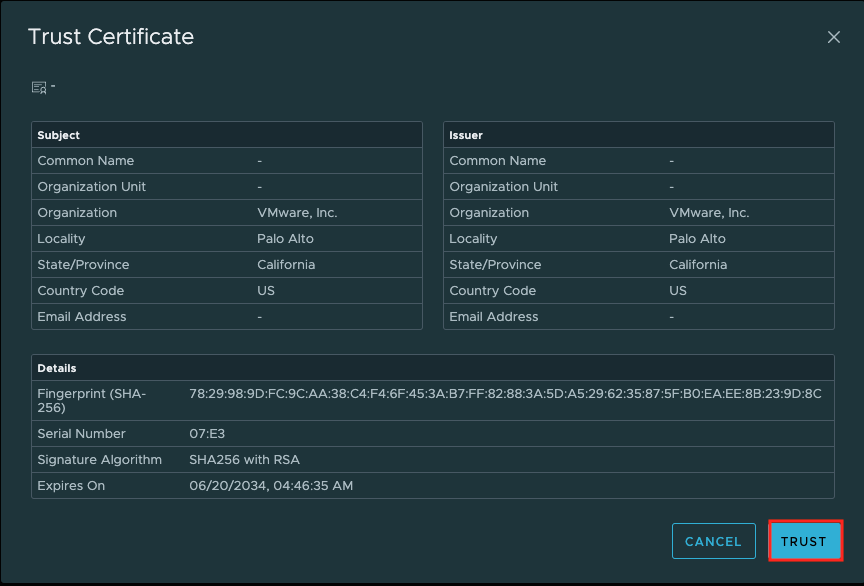
7. Trust the Certificate
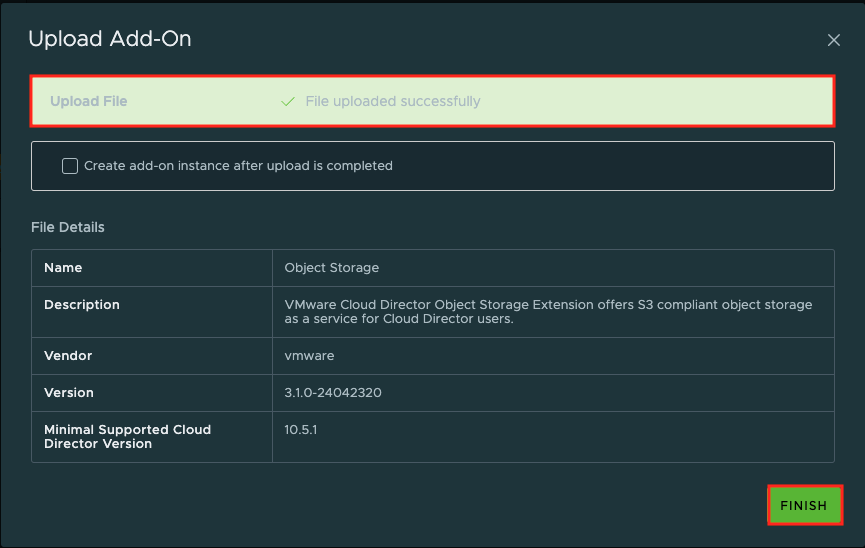
8. The ISO will upload to VCD and the status bar will indicate the upload progress.
9. Once the ISO has uploaded successfully, select FINISH.
10. In the Solution Add-On Management Extension, a message will be parsed outputting Upgrade(s) of instance(s) available
- Select Review
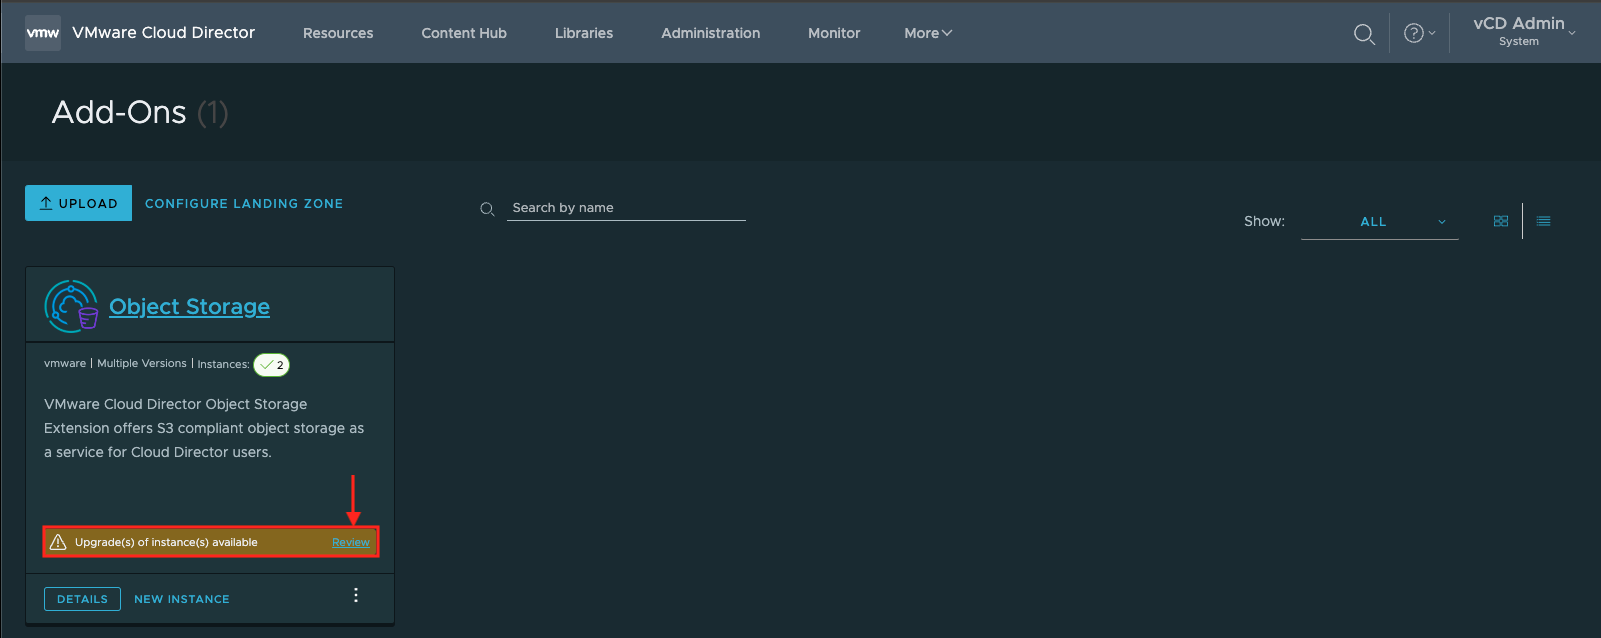
9. After selecting Review, the extension will hyperlink you to the Object Storage | Instances section.
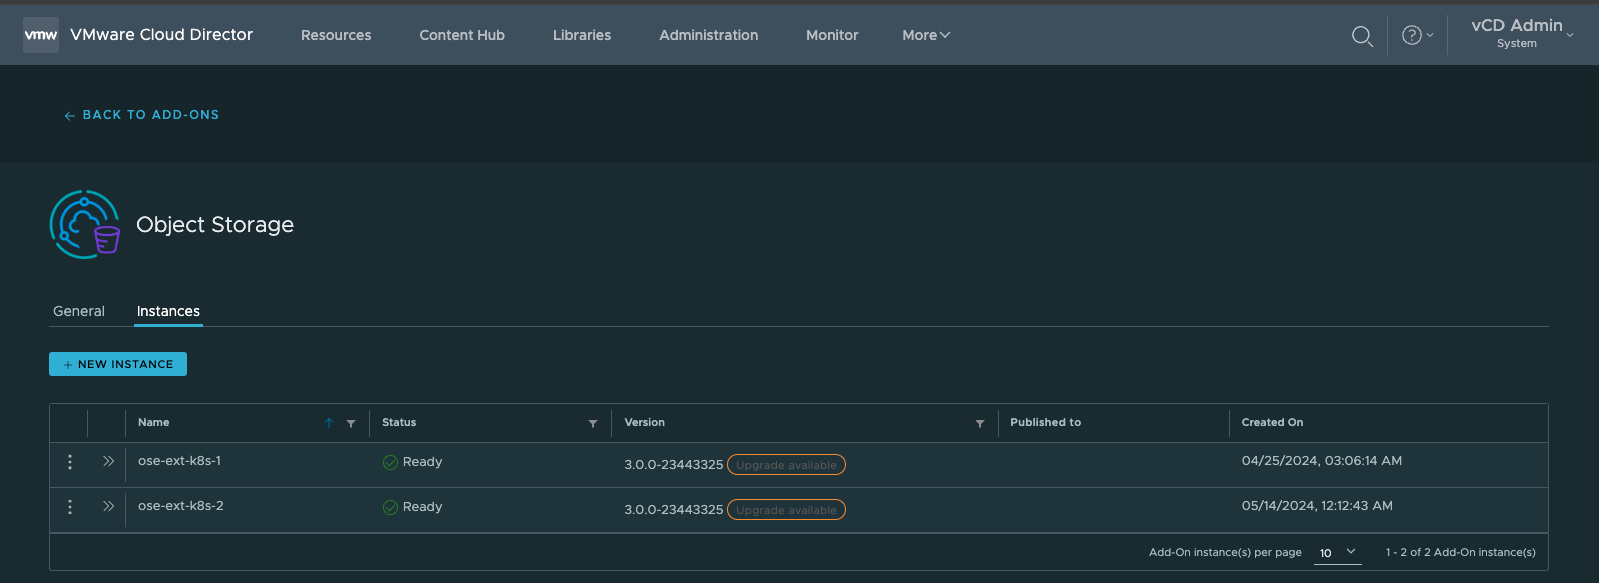
10. Select the ellipsis of the Instance you want to upgrade, and select Upgrade.
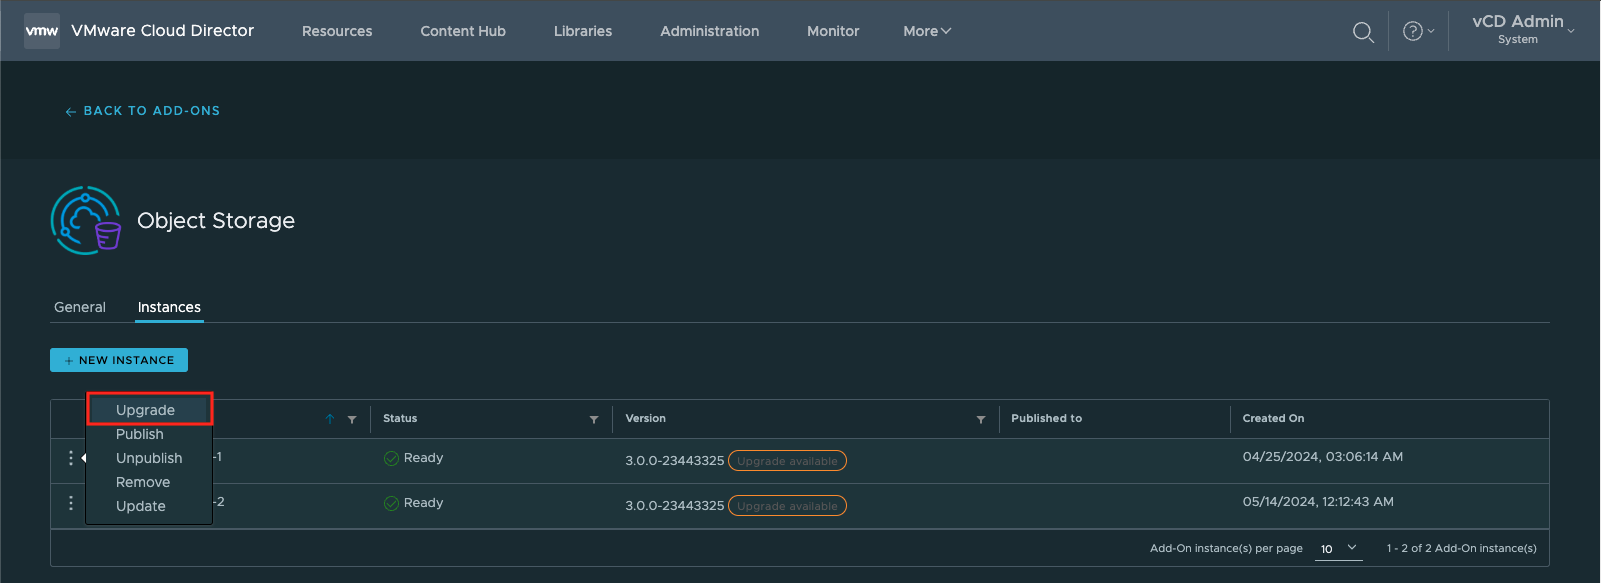
11. Examine Available Versions, and select UPGRADE.

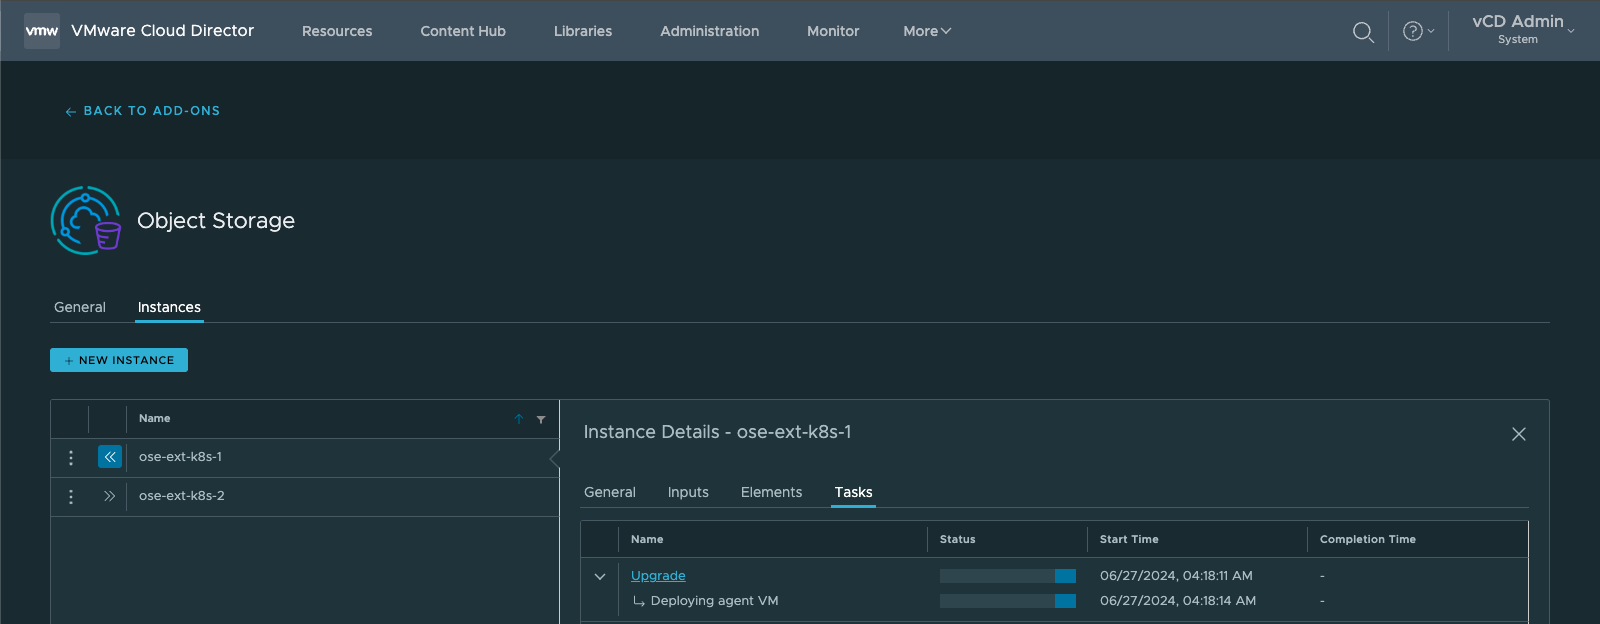
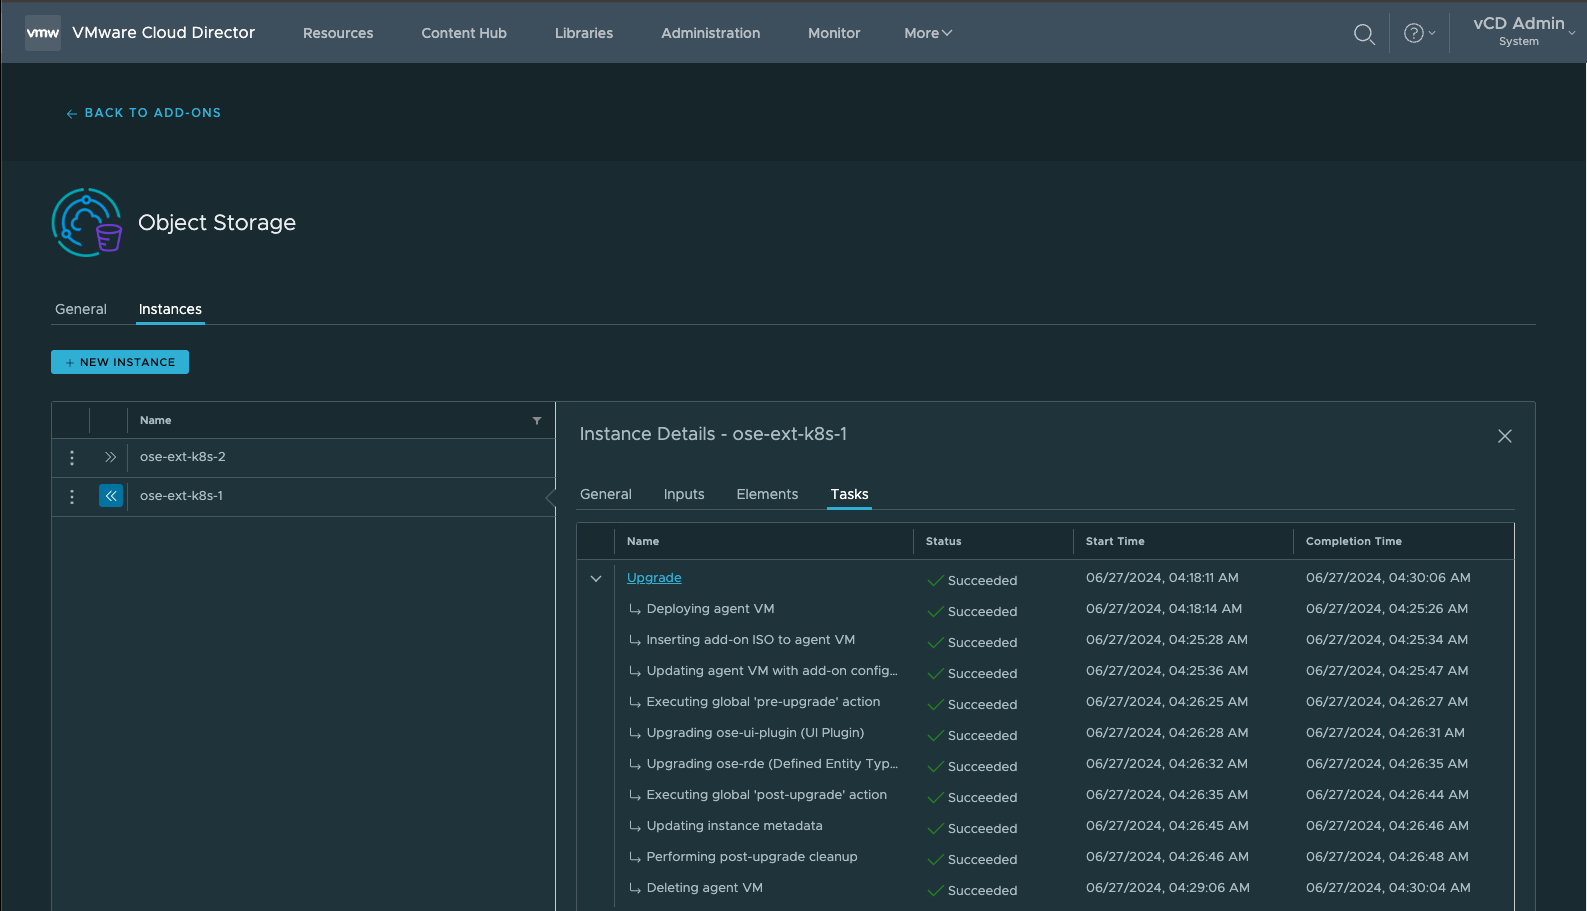
12. You can examine the Upgrade Tasks (10 Tasks)
13.Once it successfully completes, ensure to upgrade the remaining Object Storage Instances by repeating steps 10–12.
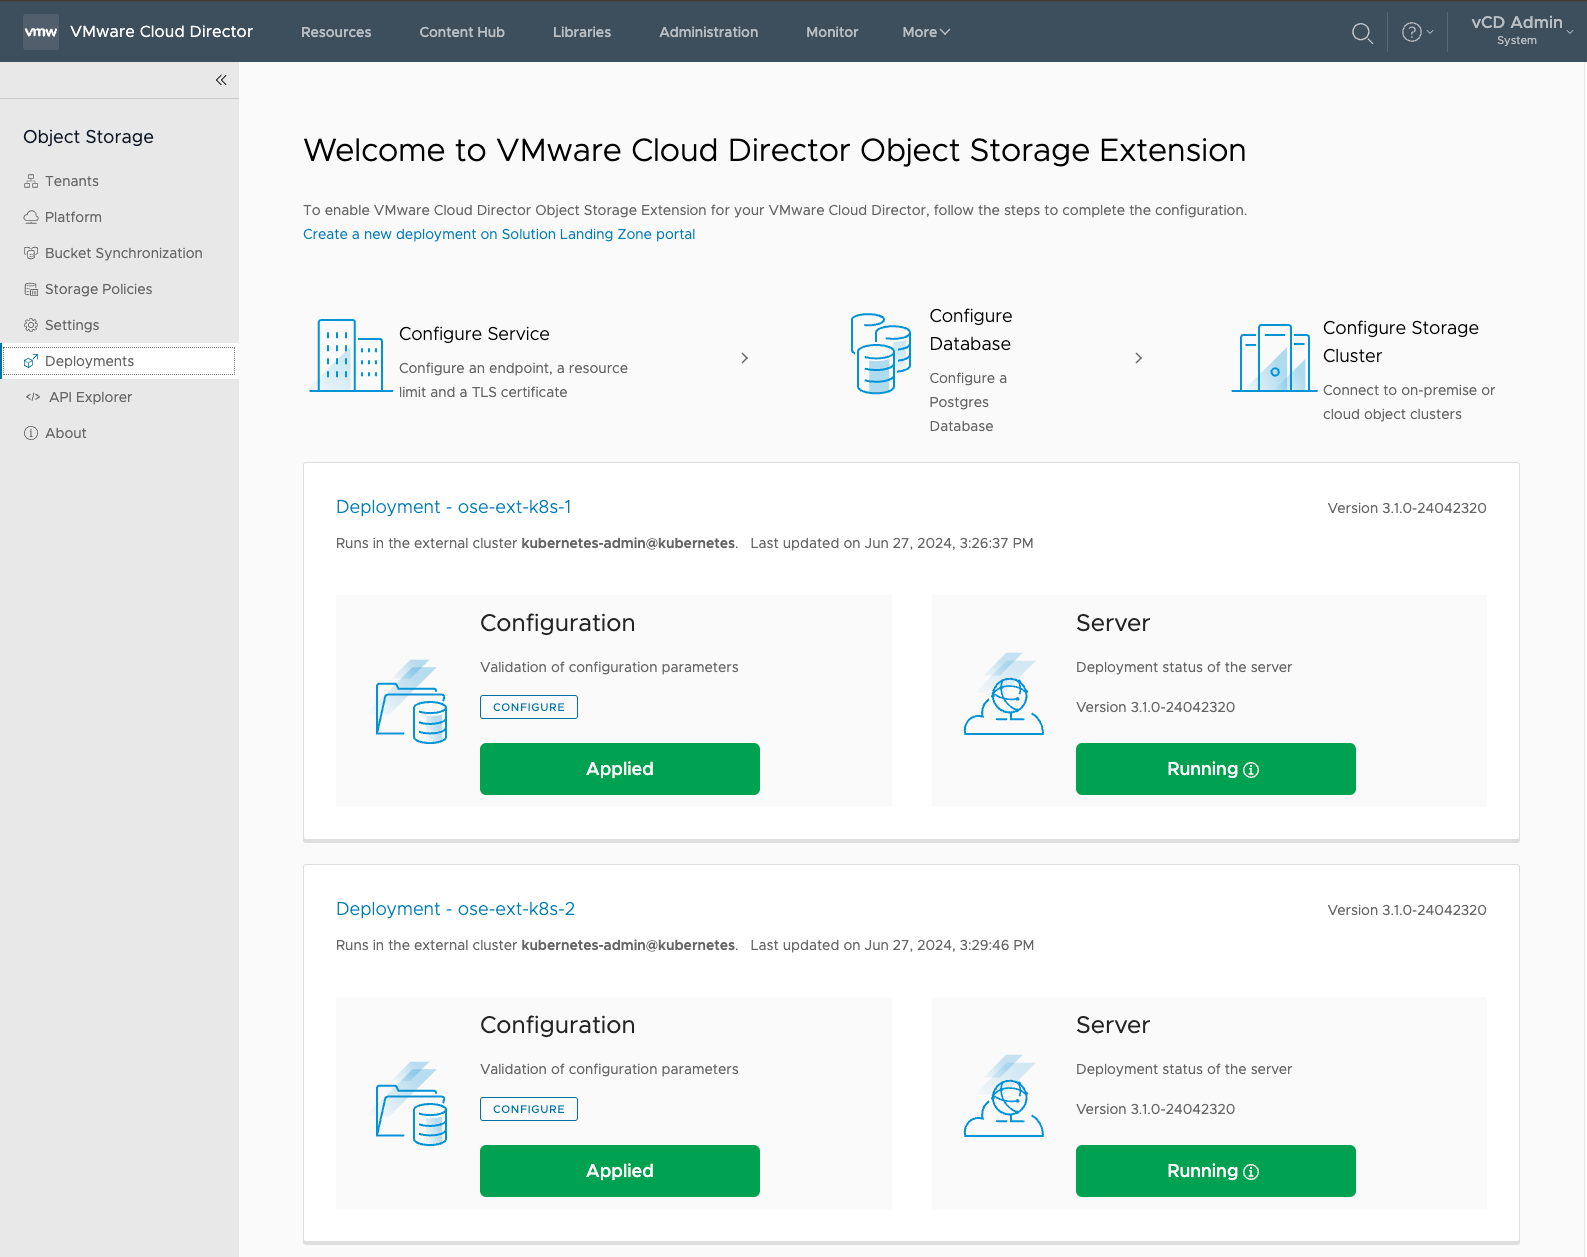
¶ Finalizing the Object Storage Deployment Upgrade
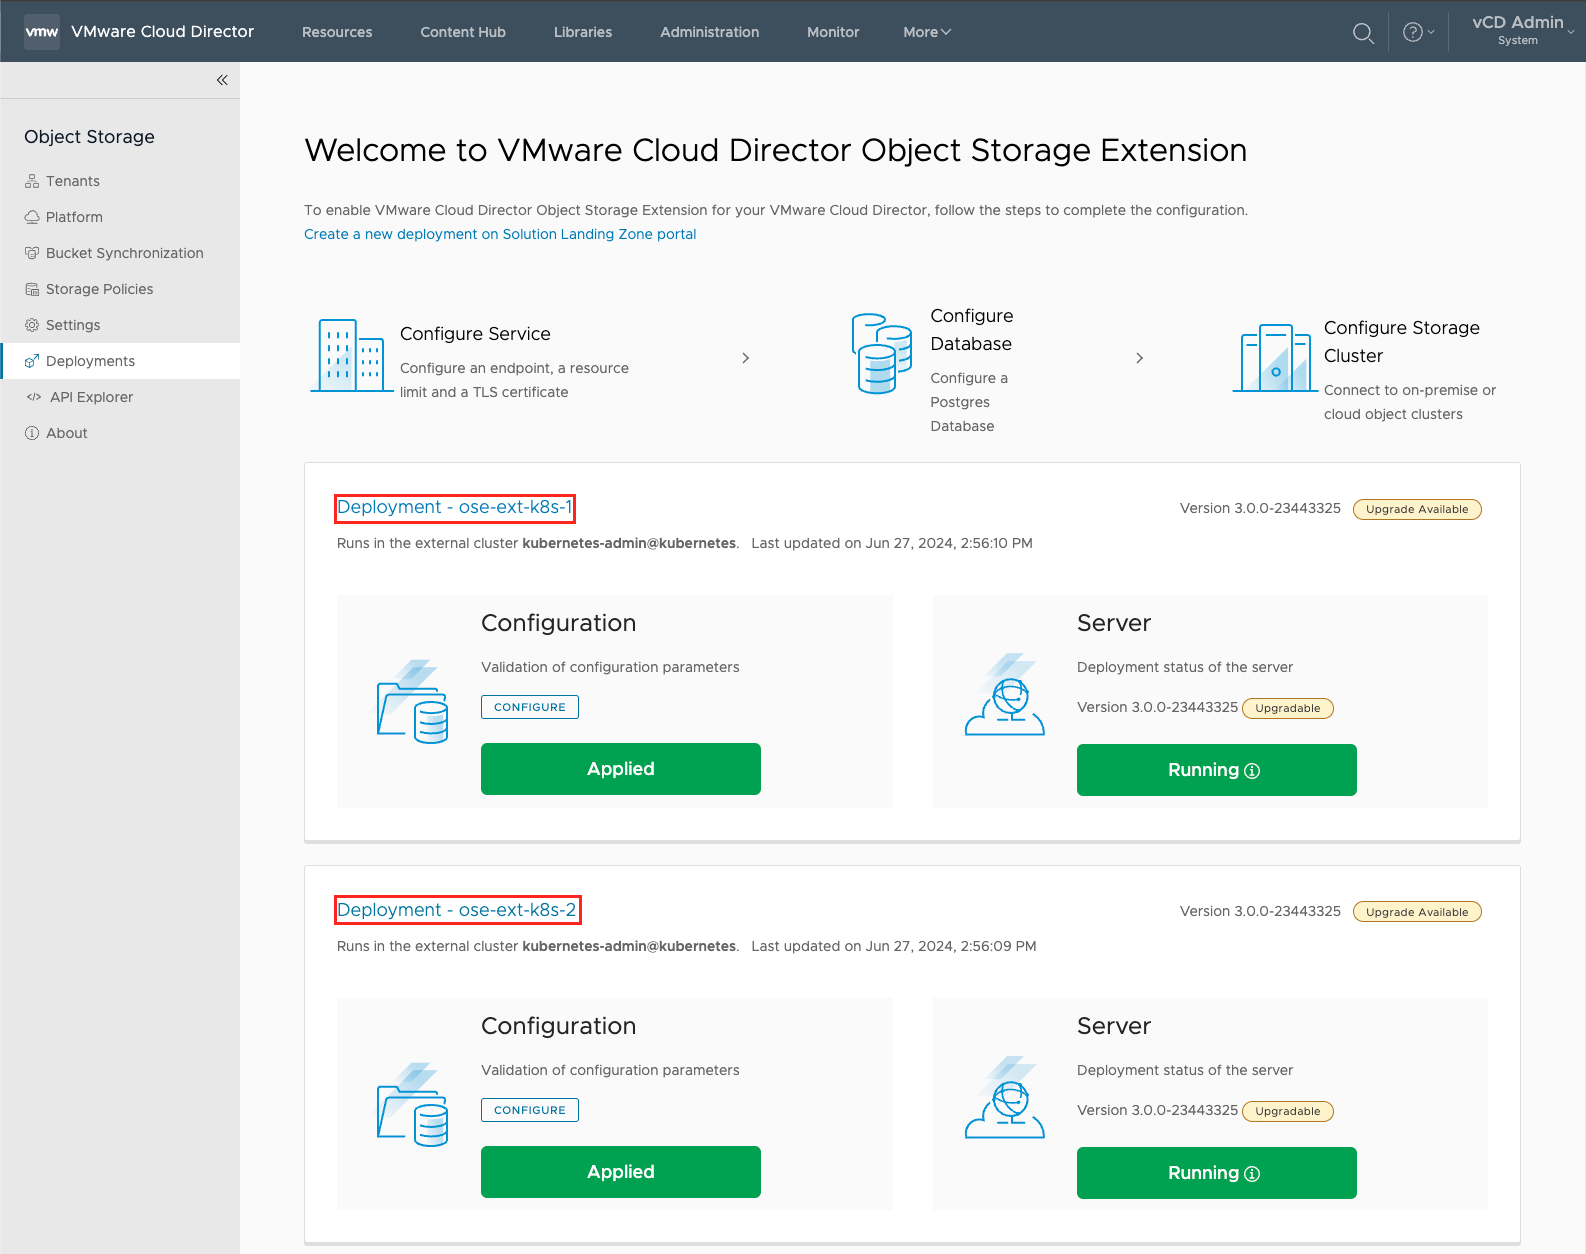
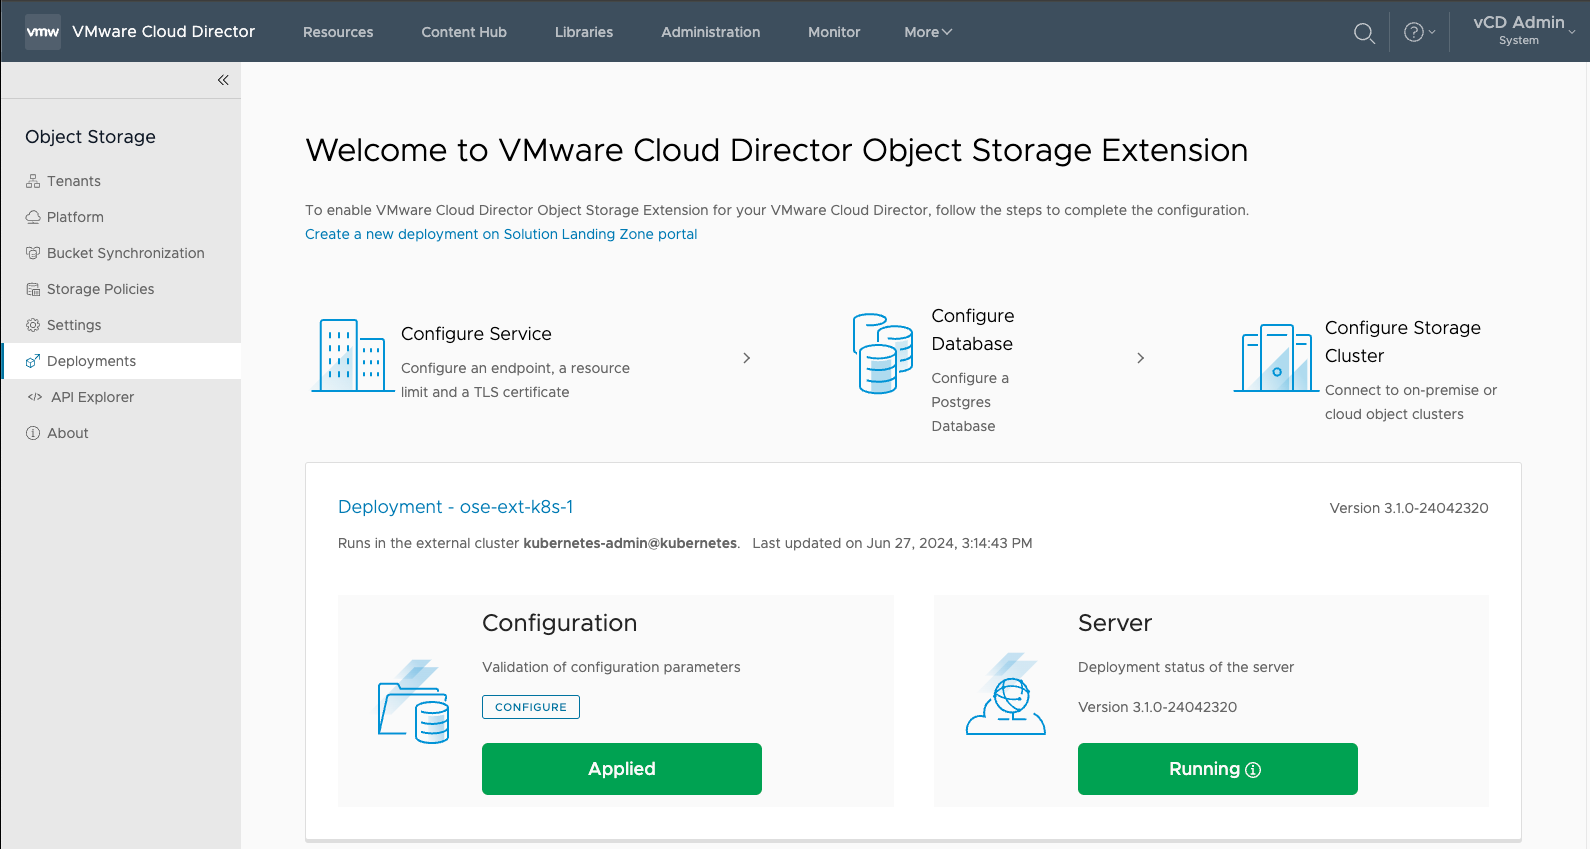
1. Go to More > Object Storage
2. In the Object Storage Extension, select Deployments.
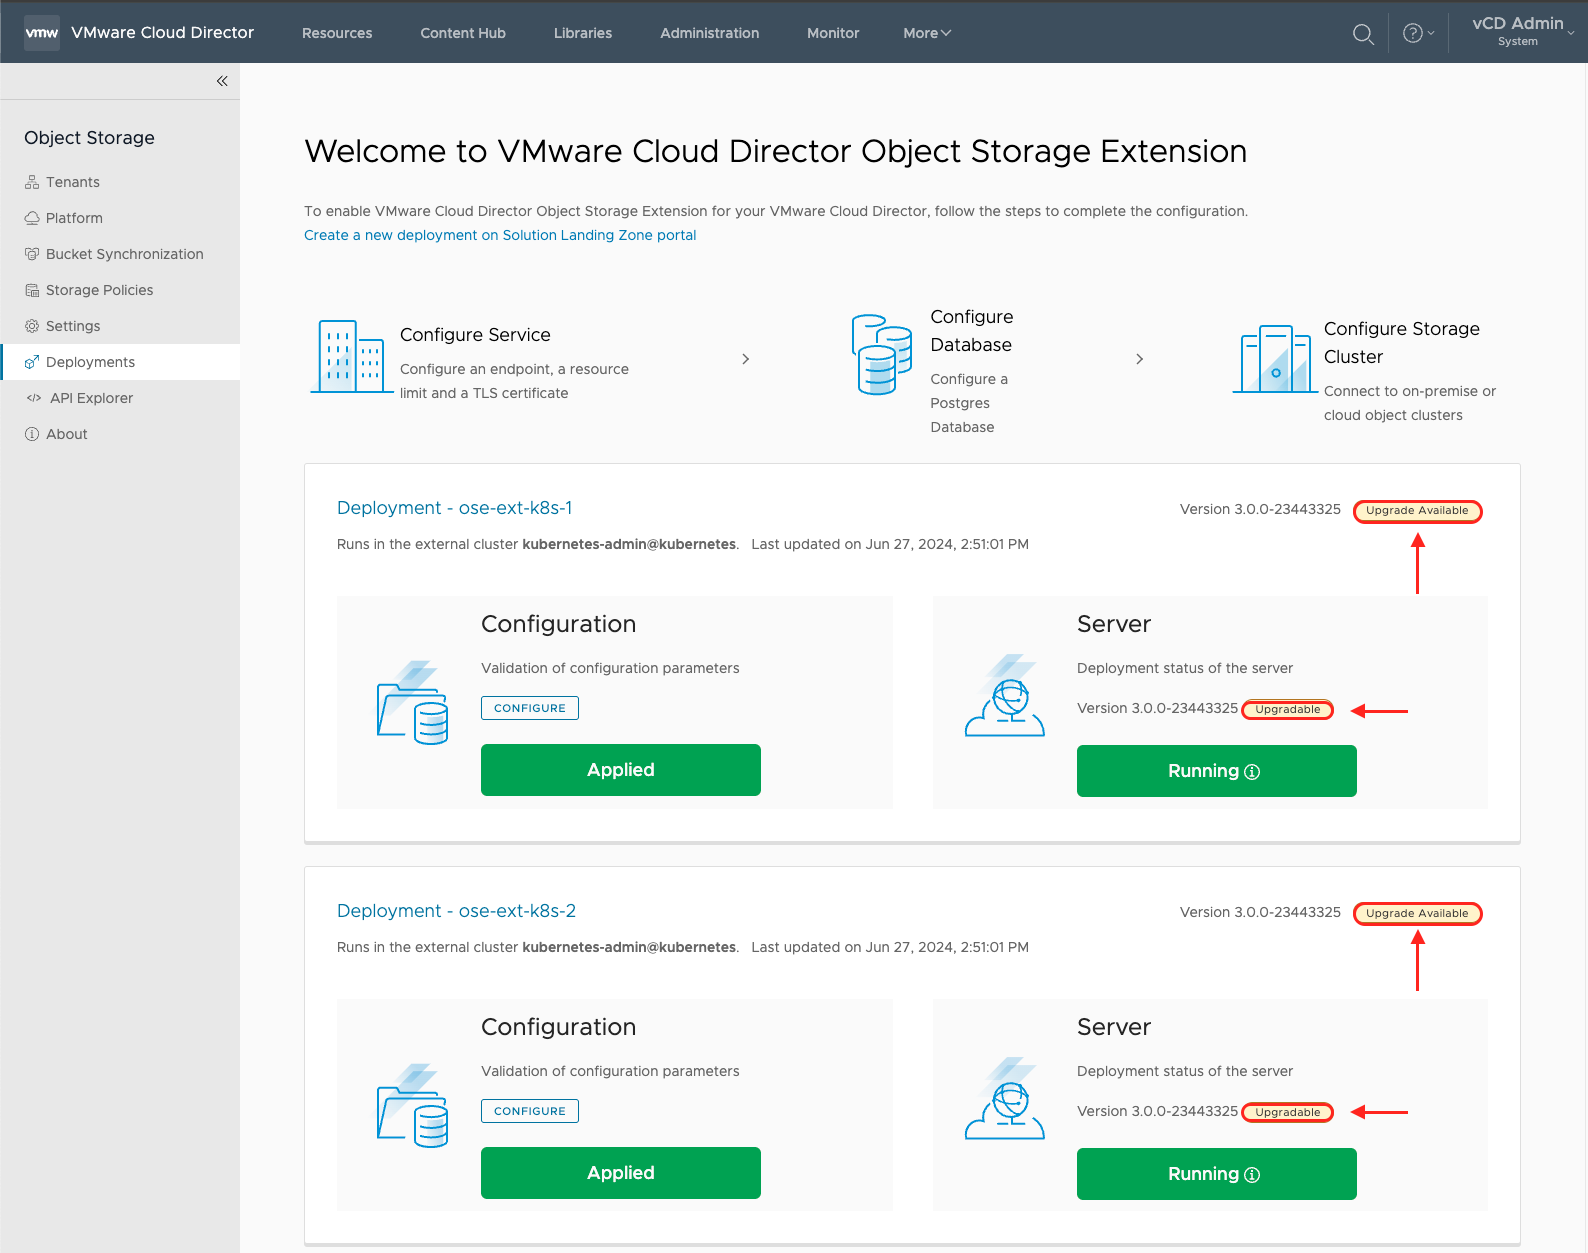
3. You will examine that each Deployment Instance has an Upgradable flag attached to it:
4. Click on the OSE deployment.
5. In the Deployment Instance, click on Action > Upgrade
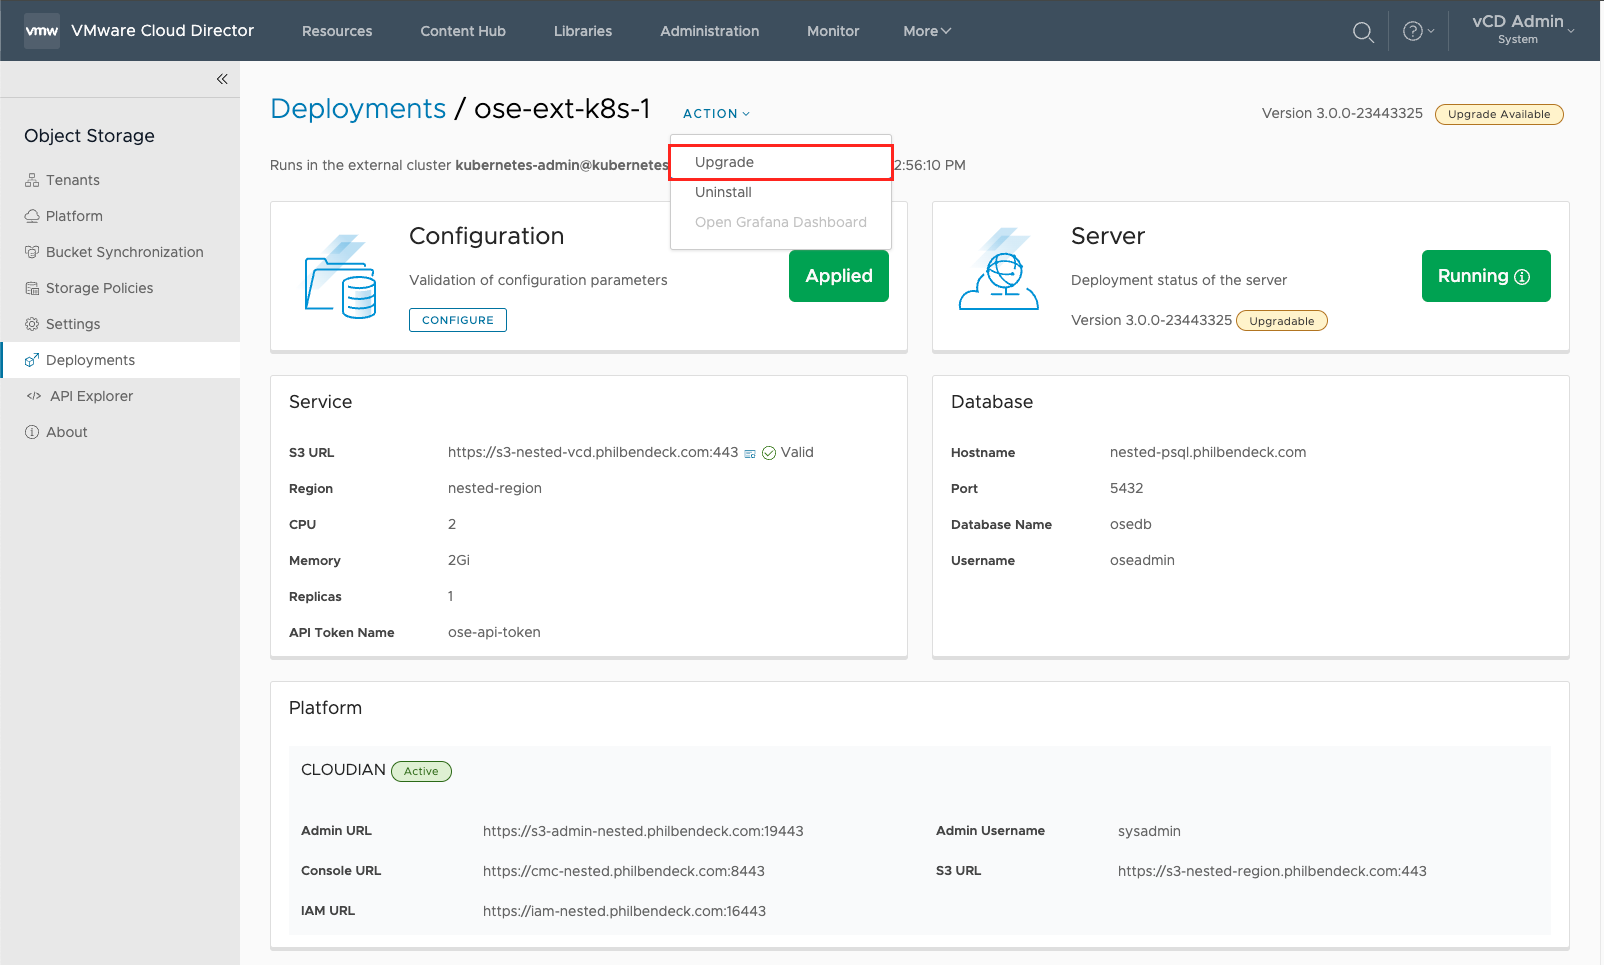
6. After selecting Upgrade, you will be presented with a yml file that you must download and execute on the kubernetes cluster.

- Use
scpor any supported Linux file transfer utility to upload the file to your Kubernetes Cluster.
7. After downloading the yml file ose-upgrade-ose-ext-k8s-1.yml, execute the command on your kubernetes cluster as illustrated in the screenshot on step 6:
kubectl apply -f ose-upgrade-ose-ext-k8s-1.ymlkubectl apply -f ose-upgrade-ose-ext-k8s-1.yml
serviceaccount/vcd-ose-controller-manager unchanged
role.rbac.authorization.k8s.io/vcd-ose-leader-election-role unchanged
clusterrole.rbac.authorization.k8s.io/vcd-ose-manager-role unchanged
clusterrole.rbac.authorization.k8s.io/vcd-ose-metrics-reader unchanged
clusterrole.rbac.authorization.k8s.io/vcd-ose-proxy-role unchanged
rolebinding.rbac.authorization.k8s.io/vcd-ose-leader-election-rolebinding unchanged
clusterrolebinding.rbac.authorization.k8s.io/vcd-ose-manager-rolebinding unchanged
clusterrolebinding.rbac.authorization.k8s.io/vcd-ose-proxy-rolebinding unchanged
secret/vcd-ose-image-creds unchanged
service/vcd-ose-controller-manager-metrics-service unchanged
deployment.apps/vcd-ose-controller-manager configured - You will also notice that the OSE pods will be restarted after executing the
ymlfile.
8. You can check the status of the pods with the following command:
kubectl get pods -n vcd-ose9. After executing and invoking the yml file towards the kubernetes cluster, the upgrade process will install and finalize via the Object Storage Extension:
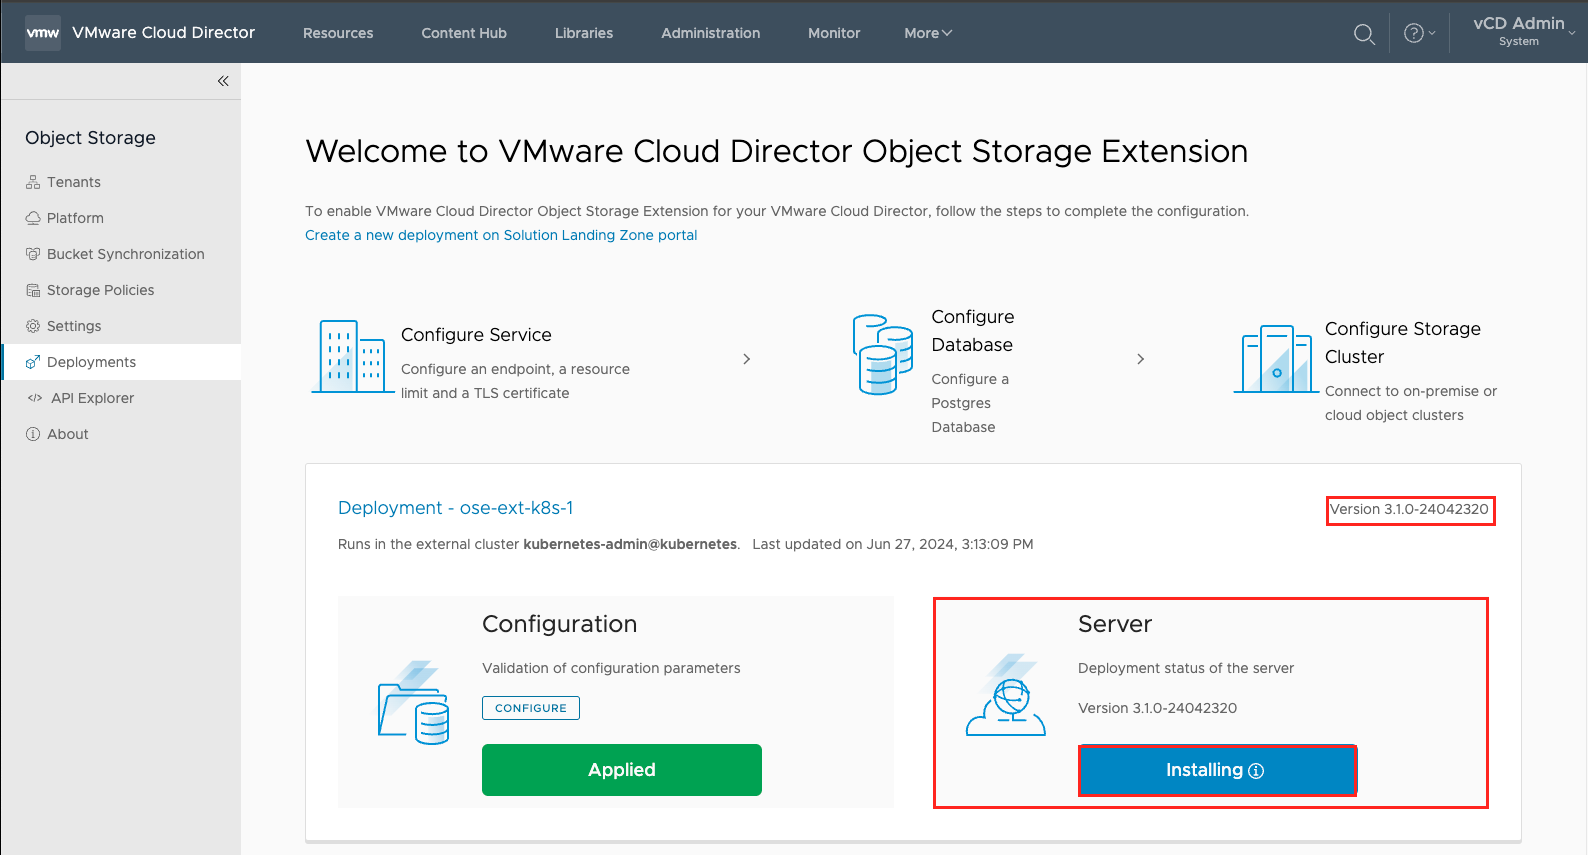
10. After the upgrade process completes, you will see that the OSE server is Running:
11. For multiple Instance Deployments, repeat and execute steps 1–10.
¶ Final State for Upgrade