¶ Introduction
- In previous iterations and releases of the VMware Cloud Director Object Storage Extension, VMware only supported Linux based deployments.
- In the OSE 3.0 Release, our engineering team enhanced the deployment by leveraging (2) installation methodologies.
- Methodology 1: VMware Cloud Director Object Storage Extension Linux Package Deployment
- Methodology 2: VMware Cloud Director Object Storage Extension Solution Add-On Deployment NEW
¶ Deployment Types
| Type | Environment | Package | VMware Cloud Director Object Storage Extension Version | Installation Interface | Configuration Interface |
| VMware Cloud Director add-on solution deployment |
Kubernetes cluster
|
ISO | 3.0 |
|
VMware Cloud Director Object Storage Extension UI |
| Linux package deployment | Ubuntu, Debian | DEB | 2.1 or later | Command-line tool apt |
Command-line tool ose |
|
RPM | 1.0 or later | Command-line tool rpm or yum |
¶ Solution Add-Ons with VMware Cloud Director
A solution add-on is the representation of a solution that is custom built for VMware Cloud Director in the VMware Cloud Director extensibility ecosystem. A solution add-on can encapsulate UI and API VMware Cloud Director extensions together with their backend services and lifecycle management. Solution add-ons are distributed as .iso files with an embedded installer for 64 bit Linux, Windows, and MacOS operating systems. A solution add-on can contain numerous elements: UI plugins, vApps, users, roles, runtime defined entities, and more.
The VMware Cloud Director Solution Standard Library and the VMware Cloud Director Extension SDK are leveraged by vendors for the creation of solution add-ons. You can install a solution add-on by running the deployer that is embedded in the .iso file, or by uploading the file in the Solution Add-On Landing Zone and using the Solution Add-On management UI.

- To learn more – Using Solution Add-Ons with VMware Cloud Director
¶ OSE Solutions Add-On Deployment (POC)
Note:
- This deployment methodology should not be used in production, as this is leveraging (1) External Kubernetes Node and (1) Cloudian HyperStore Node.
- This article was developed so VCSP partners with staging environments can POC the Solutions Add-On deployment methodology.
- In this deployment example, we will be using the VMware Cloud Director Object Storage Extension add-on deployment to an external Kubernetes cluster
¶ VMware Cloud Director Object Storage Extension add-on deployment to an external Kubernetes cluster

¶ Environment
| Product Name | Version | Number of Instances |
| VMware Cloud Director | 10.5.1.23400185 | 1 |
| vCenter Server | 7.0.3 (22837322) | 1 |
| vSphere ESXi | 7.0.3, 23307199 | 3 |
| Solutions-Add On | 1.2.0-22957452 | 1 |
| Kubernetes | 1.28.2 | 1 |
| PostgreSQL | 14.11 | 1 |
| Cloudian HyperStore | 8.0.1 GA | 1 |
¶ Deploying the OSE Solutions Add-On
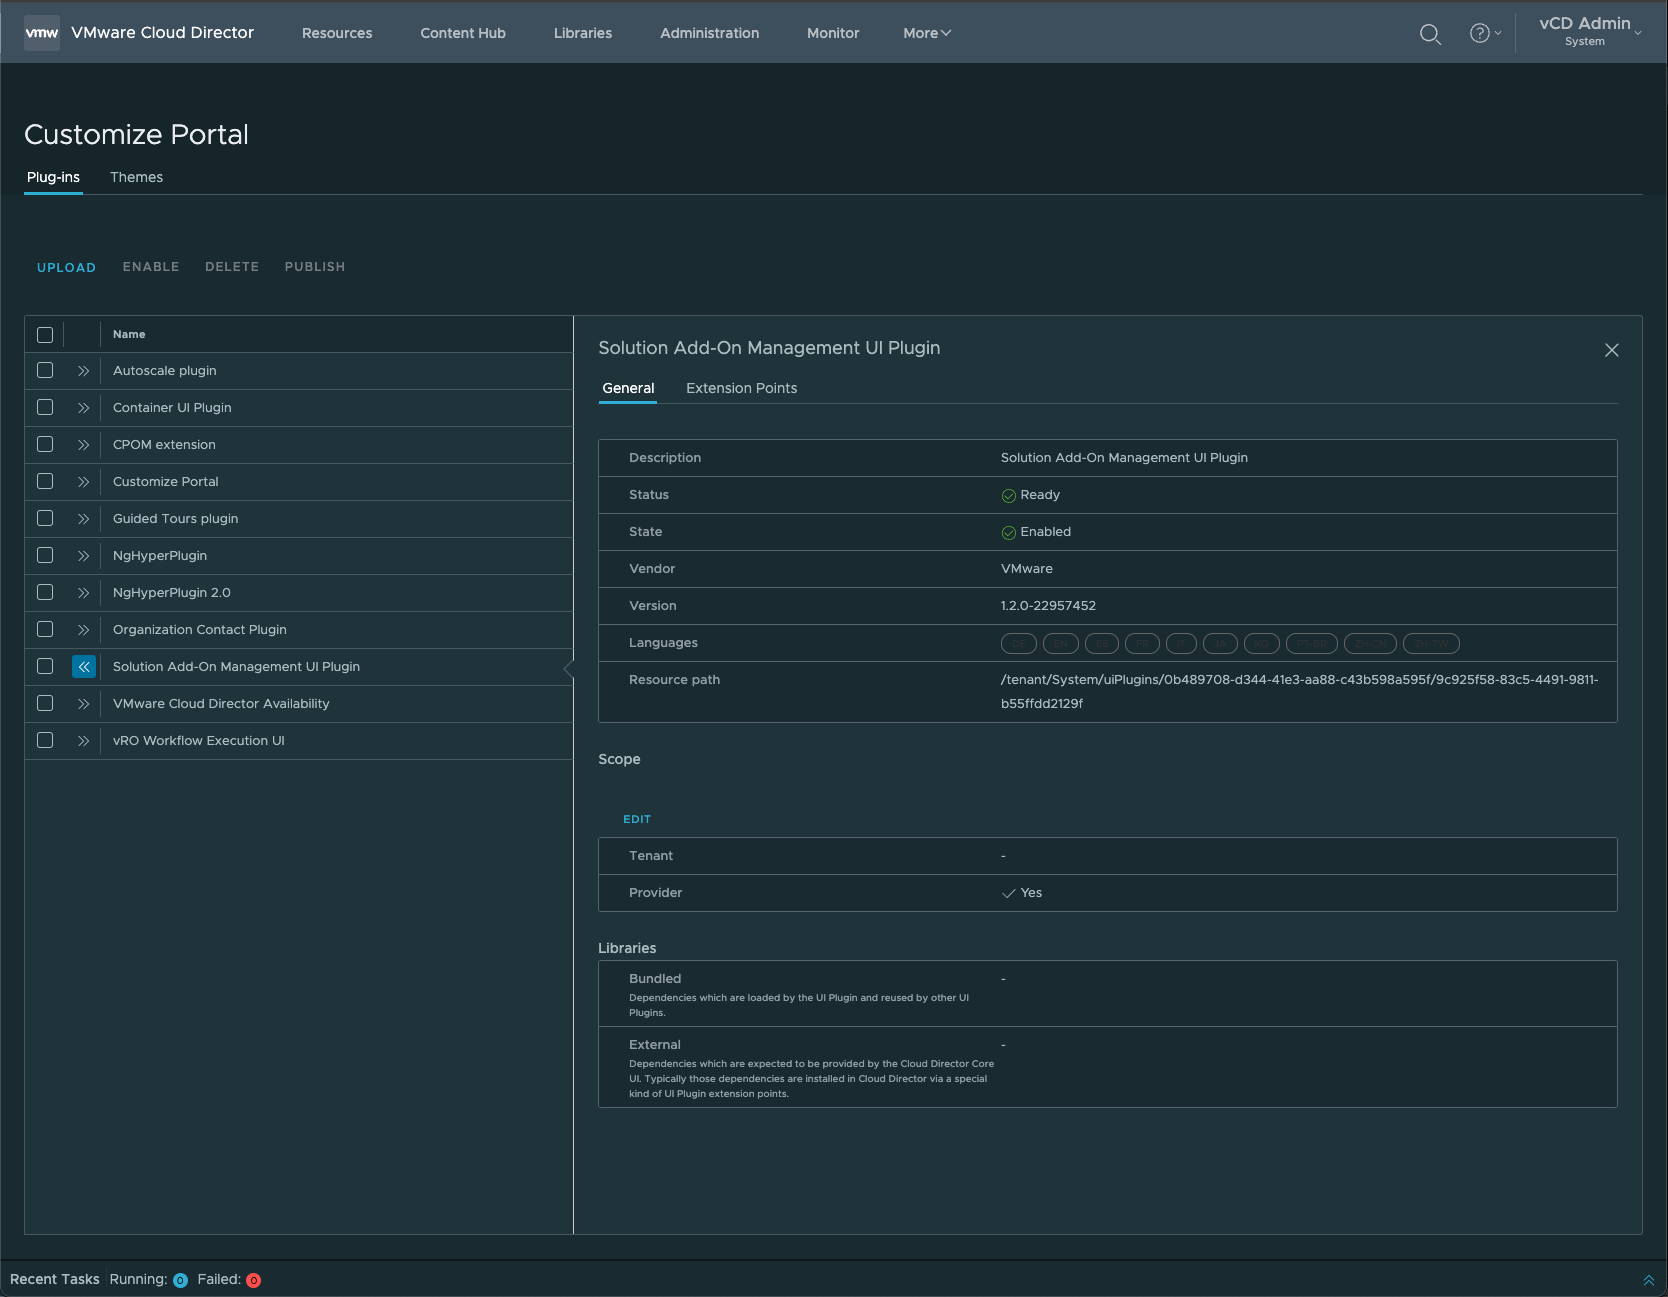
1. Ensure the Add-On Management UI Plugin is Enabled
2. Download the VMware Cloud Director Object Storage Extension 3.0 Everything ISO
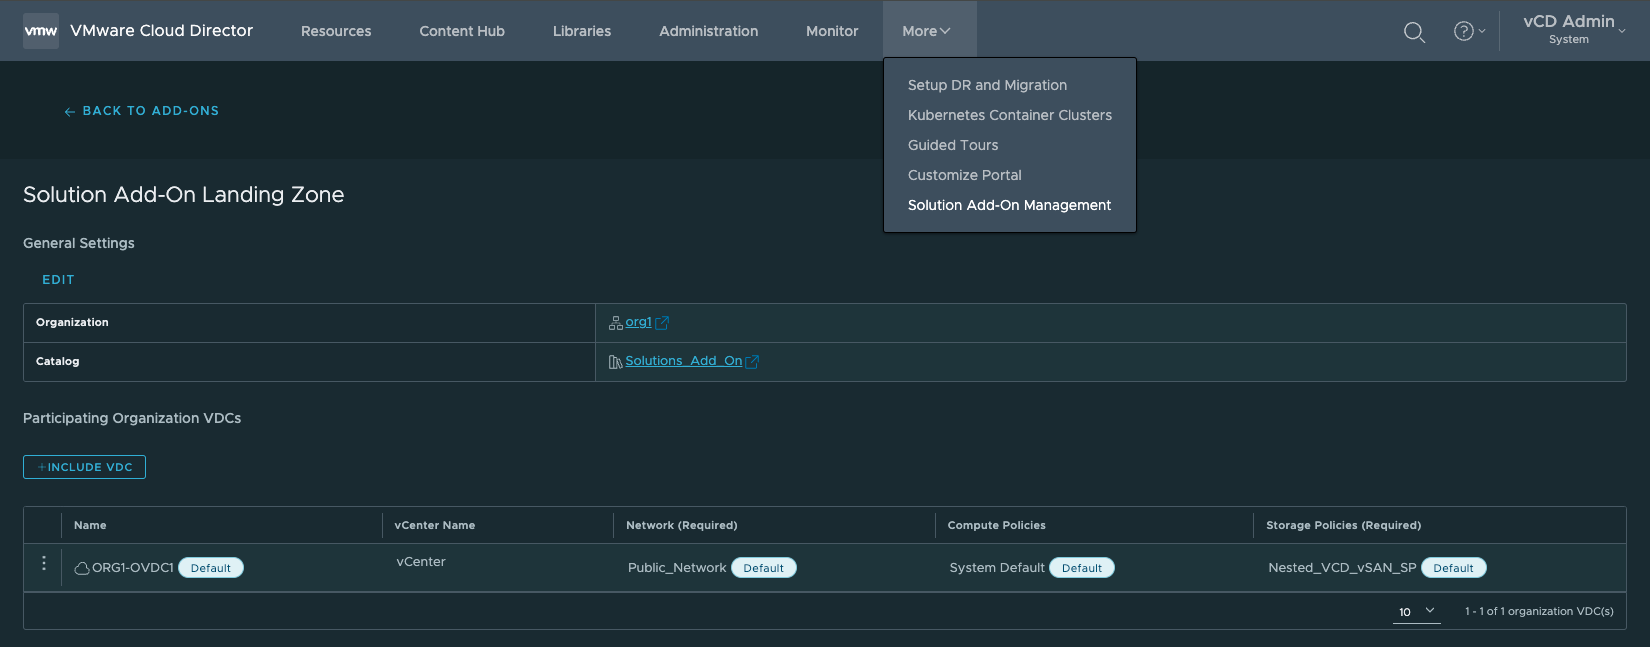
3. Go to More > Solution Add On Management, and Configure a Landing Zone.
- Requirement: A catalog must be created in order to provision the Solution Add-On Landing Zone.
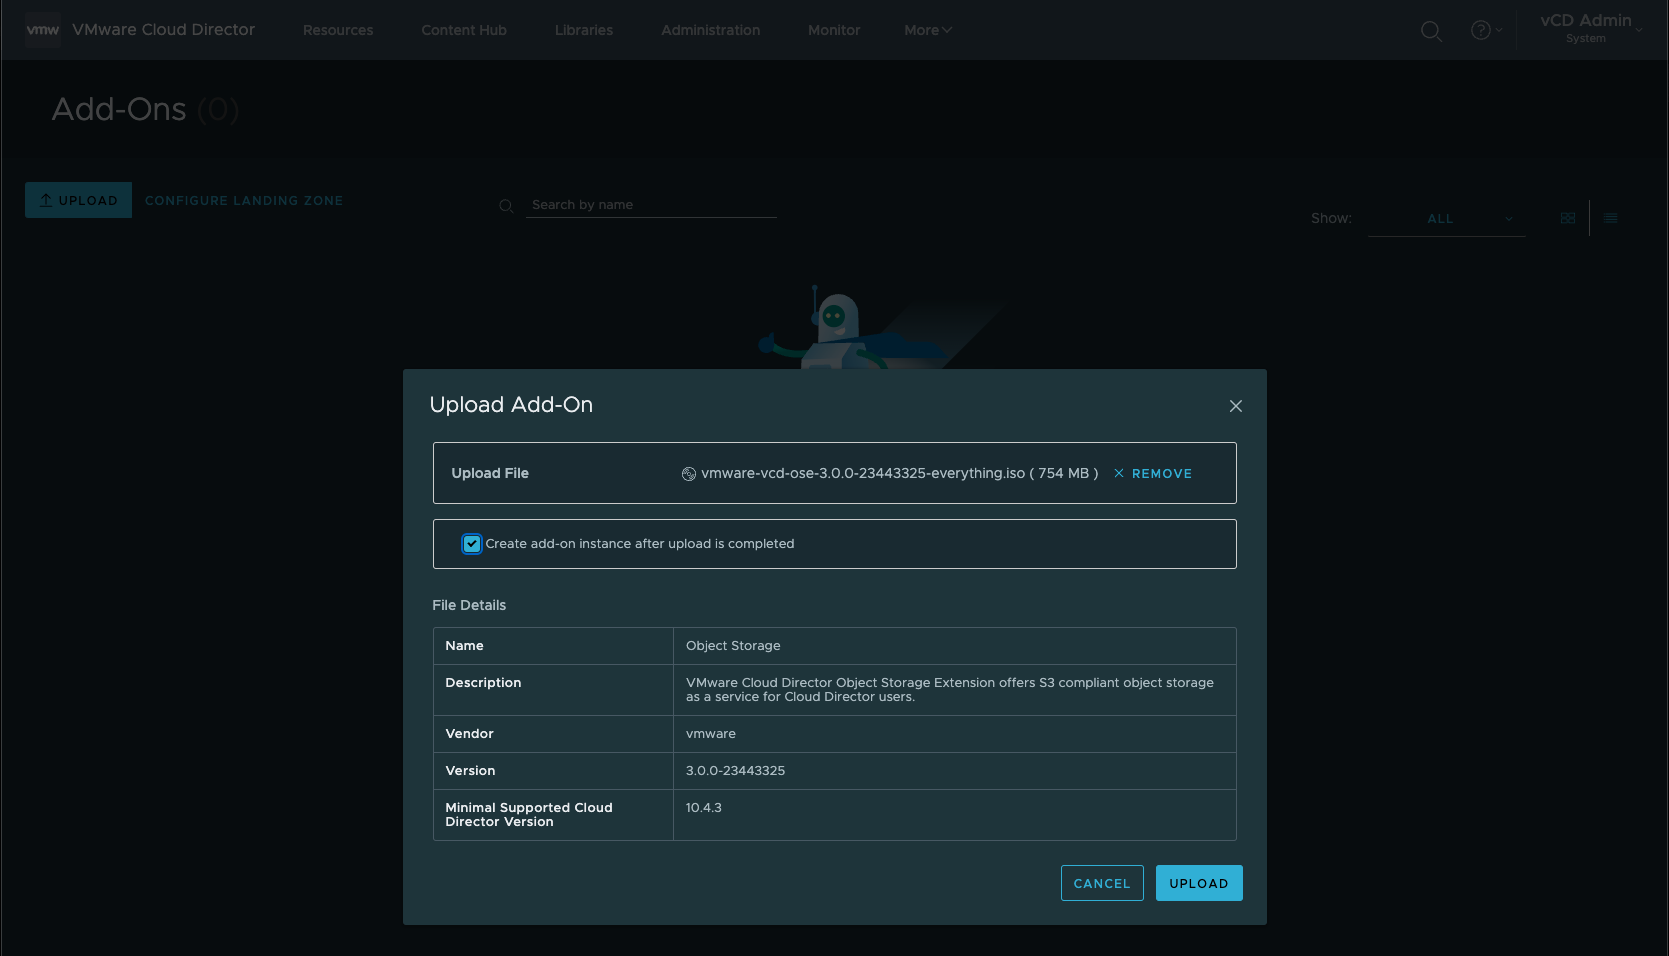
4. Upload the vmware-vcd-ose-3.0.0-23443325-everything.iso in the Upload Add-On wizard, select Create add-on instance after upload is completed, click Upload.
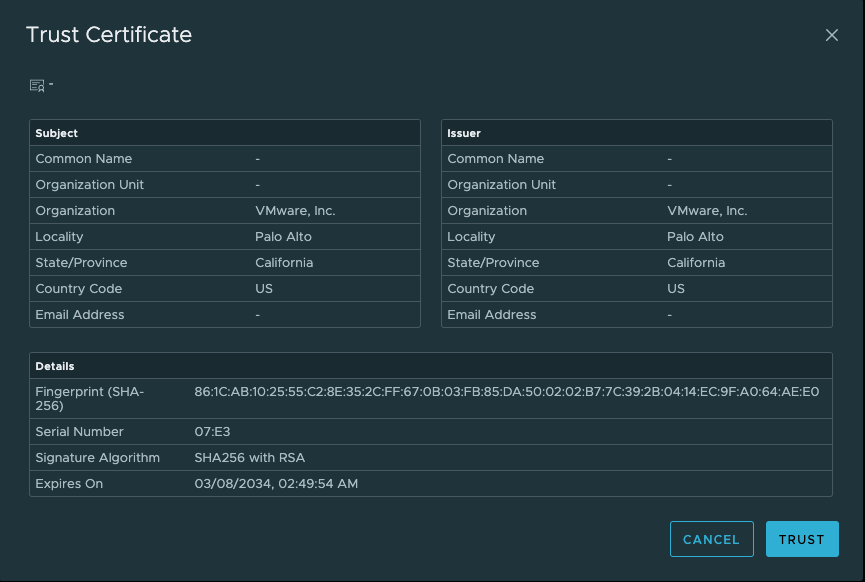
5. Trust Certificate
6. Ensure that the ISO uploaded successfully:
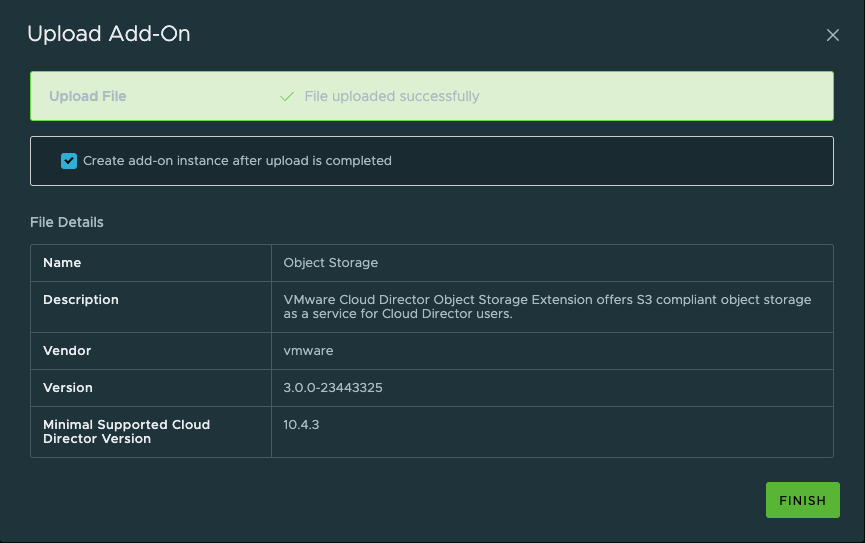
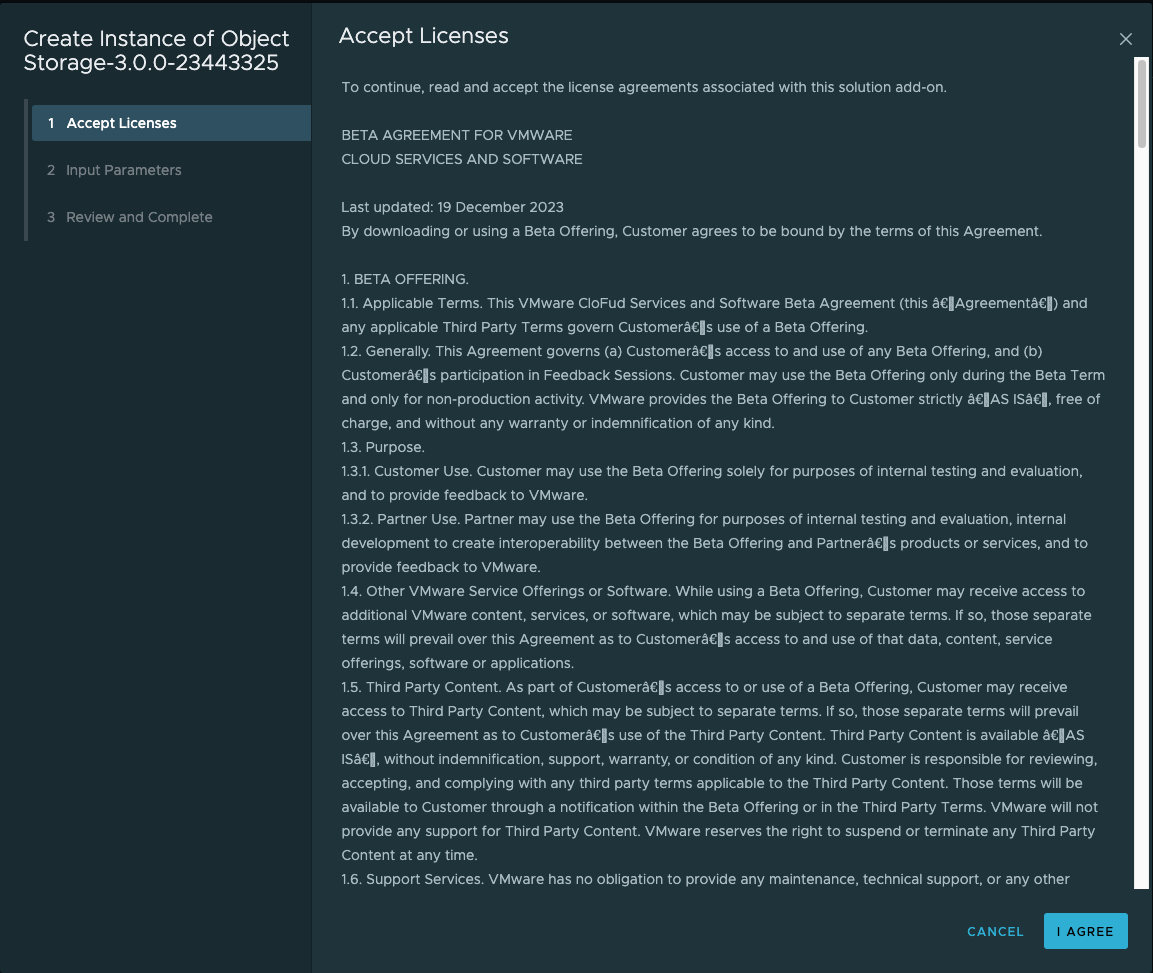
7. Accept Licenses
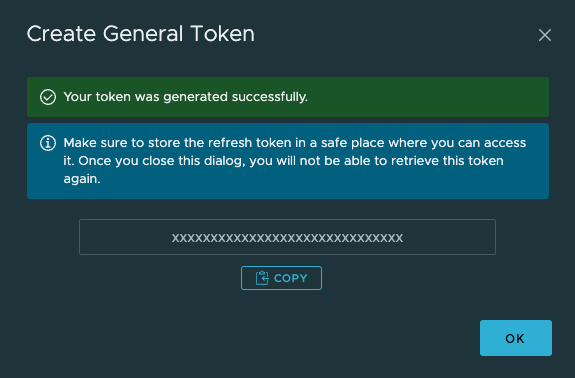
8. An API Token is required to deploy the OSE Add-On.
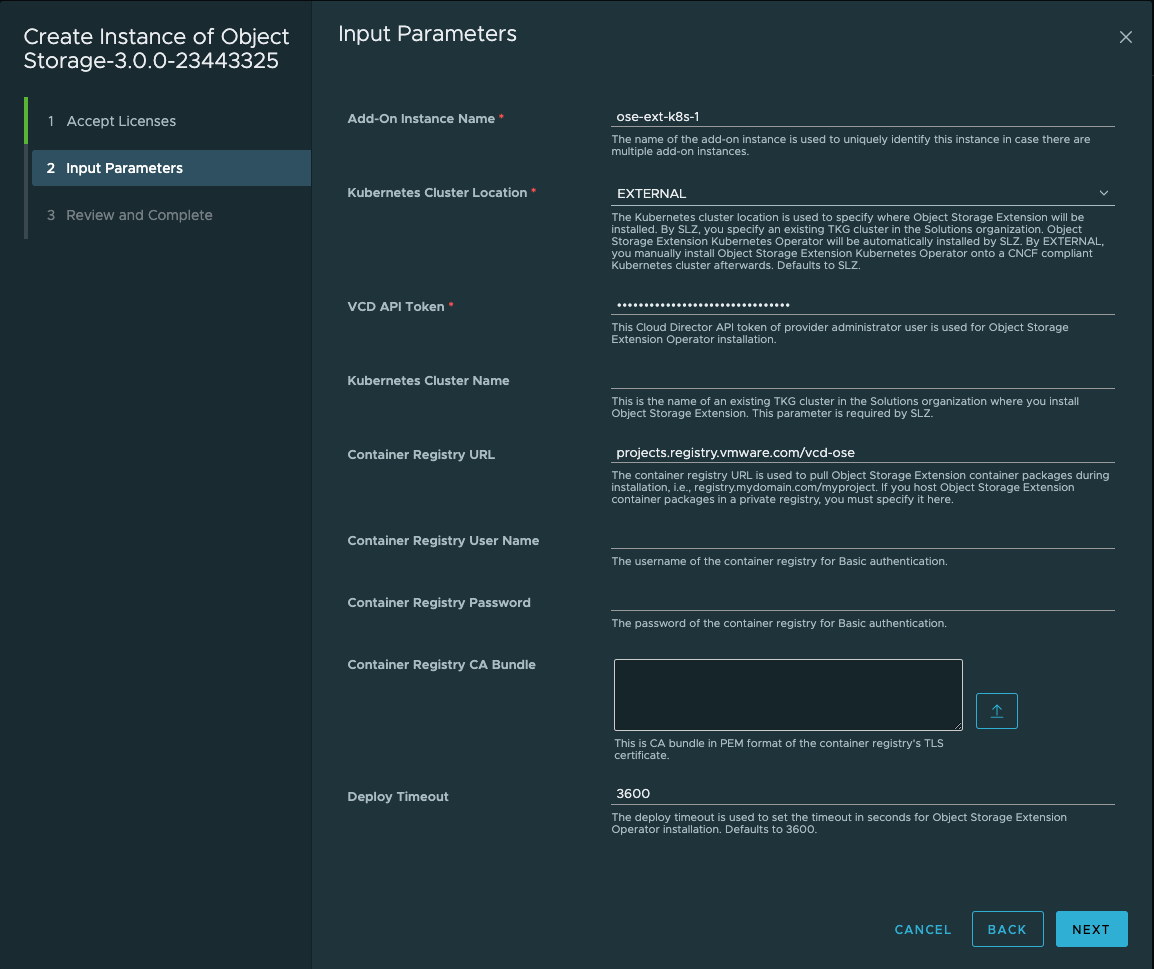
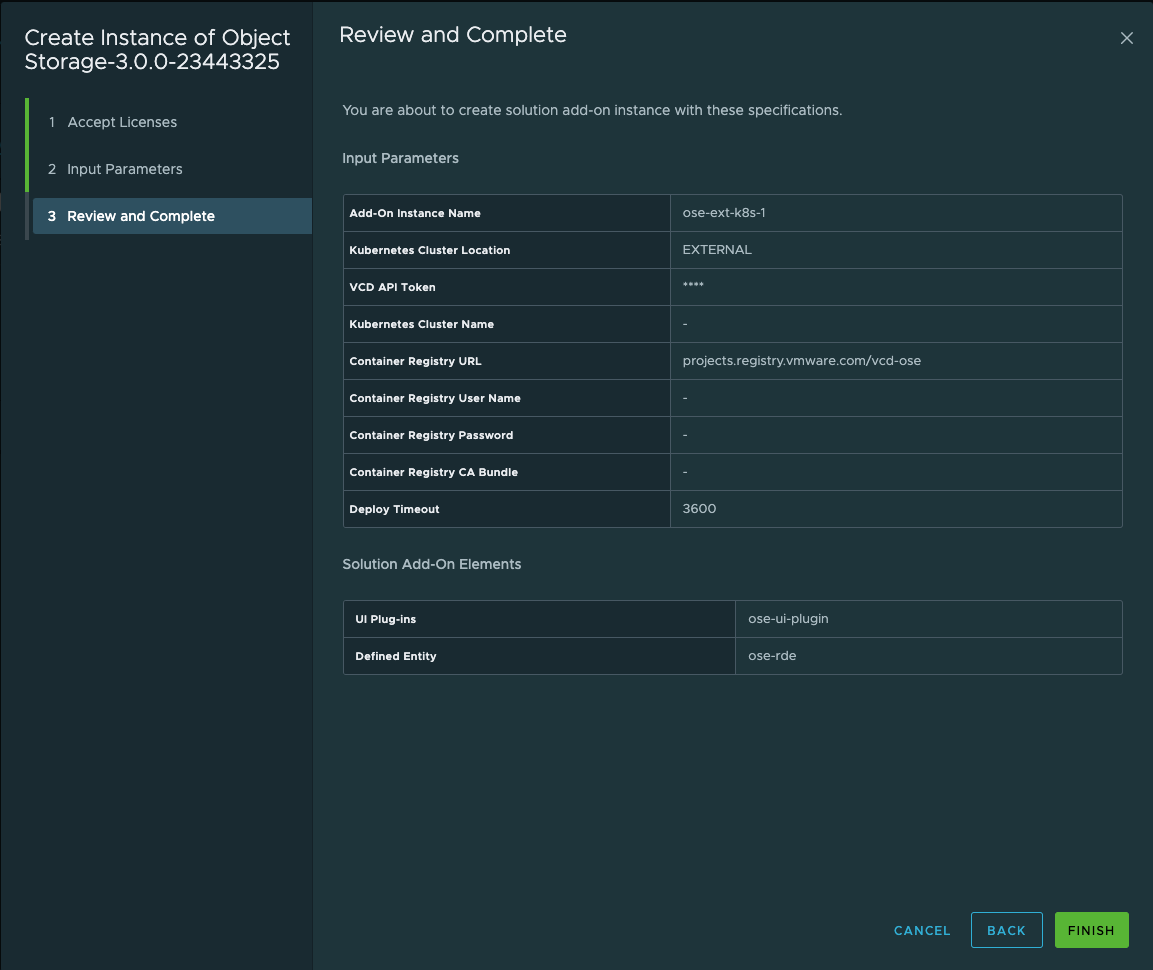
8. In the input parameters, the following variables are required:
- Add-On Instance Name
- Kubernetes Cluster Location
- The Kubernetes cluster location is used to specify where Object Storage Extension will be installed.
- By SLZ, you specify an existing TKG cluster in the Solutions organization.
- Object Storage Extension Kubernetes Operator will be automatically installed by SLZ.
- By EXTERNAL, you manually install Object Storage Extension Kubernetes Operator onto a CNCF compliant Kubernetes cluster afterwards. Defaults to SLZ.
9. Review and Complete the Deployment
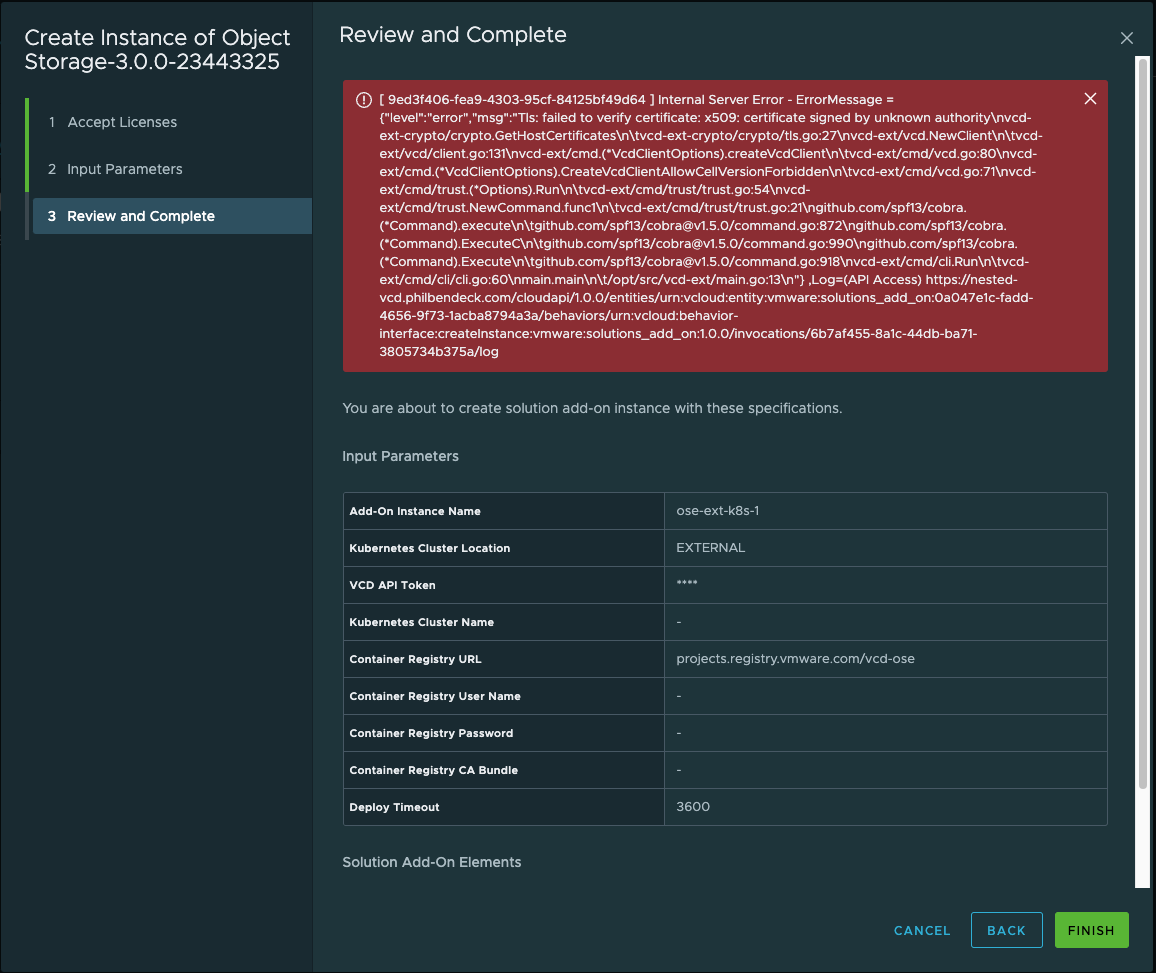
10. If you receive the following error, it signifies that you do not have your SSL certificate installed in the Public Addresses. You will need to append the VCD Certificate Chain in the Public Addresses.
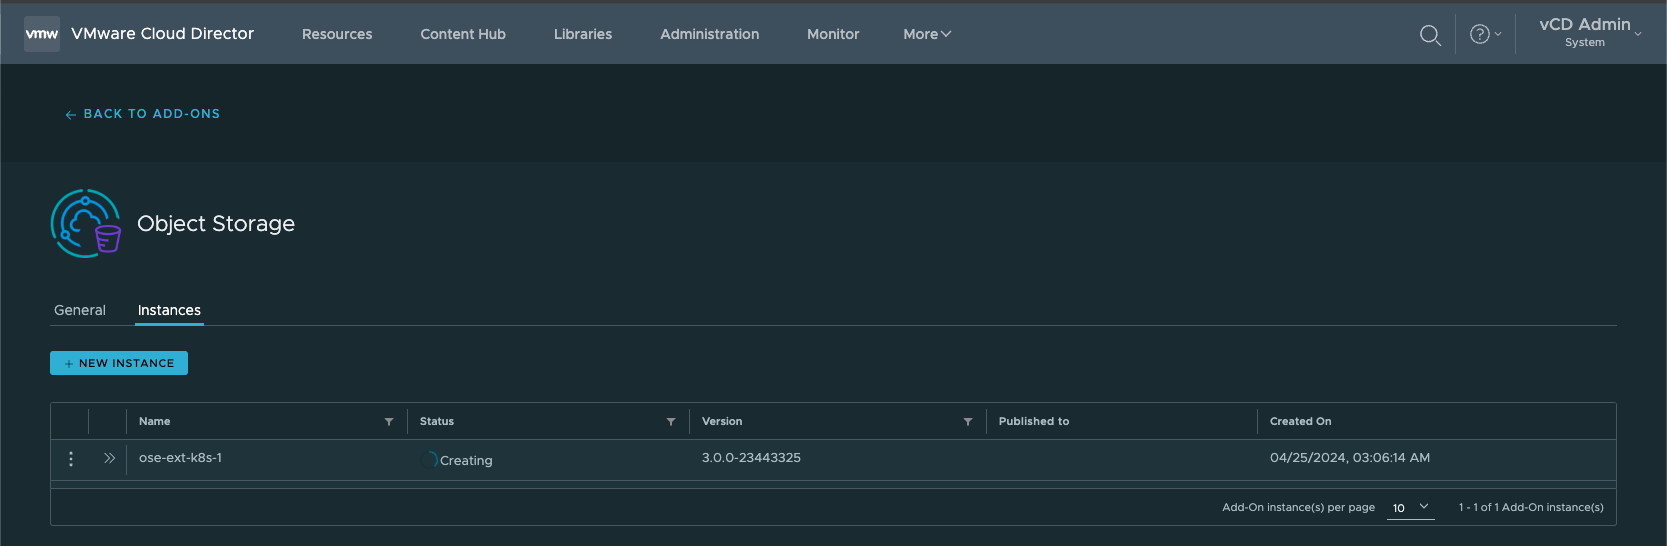
11. Allow the Object Storage Solution Add-On to finish the deployment. This process invokes and installs the OSE OVA.
12. Most customers will have self-signed certificates (default) on their ESXi hosts and VCD will fail to upload the OVA to the ESXi server it elects for the upload.
You can tail the following log:
/opt/vmware/vcloud-director/logs/vcloud-container-debug.log
2024-04-25 03:39:06,542 | DEBUG    | vim-proxy-activity-pool-17 | ImportVAppFromOvfActivity      | uploading VfsFile[fileObject=file:///opt/vmware/vcloud-director/data/transfer/2a94cc0b-4c88-4f85-8e44-df34ef51f8bb/solutions-agent-23068874-disk1.vmdk] to https://nested-esxi7-vm3.philbendeck.com/nfc/52f27a03-88b1-49e4-24cb-5b53a2875e7c/disk-0.vmdk | requestId=vcdext-create-instance-oseextk8s1-vmware-solutionsagent-1-1-0-23068874-f8cbde9b-d602-4e2a-ae86-6d59d41d35de,request=POST https://nested-vcd.philbendeck.com/api/catalog/25dd583a-aaaa-4616-a2f2-b19ca28ce03c/action/upload,requestTime=1714030500551,remoteAddress=192.168.1.184:52346,userAgent=Go-http-client/1.1,accept=application/*+json;version 38.1 vcd=78bf95fd-d6c7-41a8-b28b-89f539ed875a,task=e04c9180-3bc8-4ef5-b242-0ca17187b20e activity=(com.vmware.vcloud.backendbase.management.system.TaskActivity,urn:uuid:e04c9180-3bc8-4ef5-b242-0ca17187b20e) activity=(com.vmware.vcloud.vdc.impl.CreateStoredVmActivity,urn:uuid:393f4719-3957-4366-8ed9-25bec21d89b1) activity=(com.vmware.vcloud.fabric.storage.storedVm.impl.CreateVmFromImportActivity,urn:uuid:d26cf458-1980-3837-a771-1a61615414b2) activity=(com.vmware.vcloud.val.internal.impl.ImportVAppFromOvfActivity,urn:uuid:1e002f92-2ea4-472d-82f5-f67f3cd33ee5)
2024-04-25 03:39:06,824 | DEBUG    | vim-proxy-activity-pool-17 | ImportVAppFromOvfActivity      | Exception while attempting OVF import. | requestId=vcdext-create-instance-oseextk8s1-vmware-solutionsagent-1-1-0-23068874-f8cbde9b-d602-4e2a-ae86-6d59d41d35de,request=POST https://nested-vcd.philbendeck.com/api/catalog/25dd583a-aaaa-4616-a2f2-b19ca28ce03c/action/upload,requestTime=1714030500551,remoteAddress=192.168.1.184:52346,userAgent=Go-http-client/1.1,accept=application/*+json;version 38.1 vcd=78bf95fd-d6c7-41a8-b28b-89f539ed875a,task=e04c9180-3bc8-4ef5-b242-0ca17187b20e activity=(com.vmware.vcloud.backendbase.management.system.TaskActivity,urn:uuid:e04c9180-3bc8-4ef5-b242-0ca17187b20e) activity=(com.vmware.vcloud.vdc.impl.CreateStoredVmActivity,urn:uuid:393f4719-3957-4366-8ed9-25bec21d89b1) activity=(com.vmware.vcloud.fabric.storage.storedVm.impl.CreateVmFromImportActivity,urn:uuid:d26cf458-1980-3837-a771-1a61615414b2) activity=(com.vmware.vcloud.val.internal.impl.ImportVAppFromOvfActivity,urn:uuid:1e002f92-2ea4-472d-82f5-f67f3cd33ee5)
com.vmware.ssdc.util.LMException: PKIX path building failed: sun.security.provider.certpath.SunCertPathBuilderException: unable to find valid certification path to requested target
	at com.vmware.ssdc.util.LMException.wrap(LMException.java:128)
	at com.vmware.ssdc.library.vim.LmVim.Convert(LmVim.java:509)
	at com.vmware.vcloud.val.internal.impl.ImportVAppFromOvfActivity$ImportOvfToVcPhase.invoke(ImportVAppFromOvfActivity.java:276)
	at com.vmware.vcloud.activity.executors.ActivityRunner.runPhase(ActivityRunner.java:175)
	at com.vmware.vcloud.activity.executors.ActivityRunner.run(ActivityRunner.java:112)
	at java.base/java.util.concurrent.Executors$RunnableAdapter.call(Executors.java:515)
	at java.base/java.util.concurrent.FutureTask.run(FutureTask.java:264)
	at java.base/java.util.concurrent.ThreadPoolExecutor.runWorker(ThreadPoolExecutor.java:1128)
	at java.base/java.util.concurrent.ThreadPoolExecutor$Worker.run(ThreadPoolExecutor.java:628)
	at java.base/java.lang.Thread.run(Thread.java:829)
Caused by: javax.net.ssl.SSLHandshakeException: PKIX path building failed: sun.security.provider.certpath.SunCertPathBuilderException: unable to find valid certification path to requested target
	at java.base/sun.security.ssl.Alert.createSSLException(Alert.java:131)
	at java.base/sun.security.ssl.TransportContext.fatal(TransportContext.java:360)
	at java.base/sun.security.ssl.TransportContext.fatal(TransportContext.java:303)
	at java.base/sun.security.ssl.TransportContext.fatal(TransportContext.java:298)
	at java.base/sun.security.ssl.CertificateMessage$T12CertificateConsumer.checkServerCerts(CertificateMessage.java:654)
	at java.base/sun.security.ssl.CertificateMessage$T12CertificateConsumer.onCertificate(CertificateMessage.java:473)
	at java.base/sun.security.ssl.CertificateMessage$T12CertificateConsumer.consume(CertificateMessage.java:369)
	at java.base/sun.security.ssl.SSLHandshake.consume(SSLHandshake.java:392)
	at java.base/sun.security.ssl.HandshakeContext.dispatch(HandshakeContext.java:443)
	at java.base/sun.security.ssl.HandshakeContext.dispatch(HandshakeContext.java:421)
	at java.base/sun.security.ssl.TransportContext.dispatch(TransportContext.java:183)
	at java.base/sun.security.ssl.SSLTransport.decode(SSLTransport.java:172)
	at java.base/sun.security.ssl.SSLSocketImpl.decode(SSLSocketImpl.java:1507)
	at java.base/sun.security.ssl.SSLSocketImpl.readHandshakeRecord(SSLSocketImpl.java:1417)
	at java.base/sun.security.ssl.SSLSocketImpl.startHandshake(SSLSocketImpl.java:456)
	at java.base/sun.security.ssl.SSLSocketImpl.startHandshake(SSLSocketImpl.java:427)
	at org.apache.http.conn.ssl.SSLConnectionSocketFactory.createLayeredSocket(SSLConnectionSocketFactory.java:436)
	at org.apache.http.conn.ssl.SSLConnectionSocketFactory.connectSocket(SSLConnectionSocketFactory.java:384)
	at org.apache.http.impl.conn.DefaultHttpClientConnectionOperator.connect(DefaultHttpClientConnectionOperator.java:142)
	at org.apache.http.impl.conn.PoolingHttpClientConnectionManager.connect(PoolingHttpClientConnectionManager.java:376)
	at org.apache.http.impl.execchain.MainClientExec.establishRoute(MainClientExec.java:393)
	at org.apache.http.impl.execchain.MainClientExec.execute(MainClientExec.java:236)
	at org.apache.http.impl.execchain.ProtocolExec.execute(ProtocolExec.java:186)
	at org.apache.http.impl.execchain.RetryExec.execute(RetryExec.java:89)
	at org.apache.http.impl.execchain.RedirectExec.execute(RedirectExec.java:110)
	at org.apache.http.impl.client.InternalHttpClient.doExecute(InternalHttpClient.java:185)
	at org.apache.http.impl.client.CloseableHttpClient.execute(CloseableHttpClient.java:83)
	at org.apache.http.impl.client.CloseableHttpClient.execute(CloseableHttpClient.java:108)
	at com.vmware.vcloud.val.httpclient.impl.HttpClientImpl.execute(HttpClientImpl.java:90)
	at com.vmware.vcloud.val.internal.impl.ImportVAppFromOvfActivity$ImportOvfToVcPhase.uploadFileToVc(ImportVAppFromOvfActivity.java:448)
	at com.vmware.vcloud.val.internal.impl.ImportVAppFromOvfActivity$ImportOvfToVcPhase.uploadFilesFromLease(ImportVAppFromOvfActivity.java:395)
	at com.vmware.vcloud.val.internal.impl.ImportVAppFromOvfActivity$ImportOvfToVcPhase.invoke(ImportVAppFromOvfActivity.java:249)
	... 7 more
Caused by: sun.security.validator.ValidatorException: PKIX path building failed: sun.security.provider.certpath.SunCertPathBuilderException: unable to find valid certification path to requested target
	at java.base/sun.security.validator.PKIXValidator.doBuild(PKIXValidator.java:439)
	at java.base/sun.security.validator.PKIXValidator.engineValidate(PKIXValidator.java:306)
	at java.base/sun.security.validator.Validator.validate(Validator.java:264)
	at java.base/sun.security.ssl.X509TrustManagerImpl.validate(X509TrustManagerImpl.java:313)
	at java.base/sun.security.ssl.X509TrustManagerImpl.checkTrusted(X509TrustManagerImpl.java:233)
	at java.base/sun.security.ssl.X509TrustManagerImpl.checkServerTrusted(X509TrustManagerImpl.java:110)
	at com.vmware.vcloud.common.crypto.ssl.TenantAwareTrustManager.checkServerTrusted(TenantAwareTrustManager.java:56)
	at com.vmware.vcloud.common.crypto.ssl.DelegatingTrustManager.checkTrust(DelegatingTrustManager.java:103)
	at com.vmware.vcloud.common.crypto.ssl.DelegatingTrustManager.checkServerTrusted(DelegatingTrustManager.java:75)
	at java.base/sun.security.ssl.AbstractTrustManagerWrapper.checkServerTrusted(SSLContextImpl.java:1492)
	at java.base/sun.security.ssl.CertificateMessage$T12CertificateConsumer.checkServerCerts(CertificateMessage.java:638)
	... 34 more
Caused by: sun.security.provider.certpath.SunCertPathBuilderException: unable to find valid certification path to requested target
	at java.base/sun.security.provider.certpath.SunCertPathBuilder.build(SunCertPathBuilder.java:146)
	at java.base/sun.security.provider.certpath.SunCertPathBuilder.engineBuild(SunCertPathBuilder.java:127)
	at java.base/java.security.cert.CertPathBuilder.build(CertPathBuilder.java:297)
	at java.base/sun.security.validator.PKIXValidator.doBuild(PKIXValidator.java:434)
- In order to resolve this issue, you can download the ESXi certificates and import them to the Trusted Certificates Library
- Import Trusted Certificates Using Your VMware Cloud Director Service Provider Admin Portal
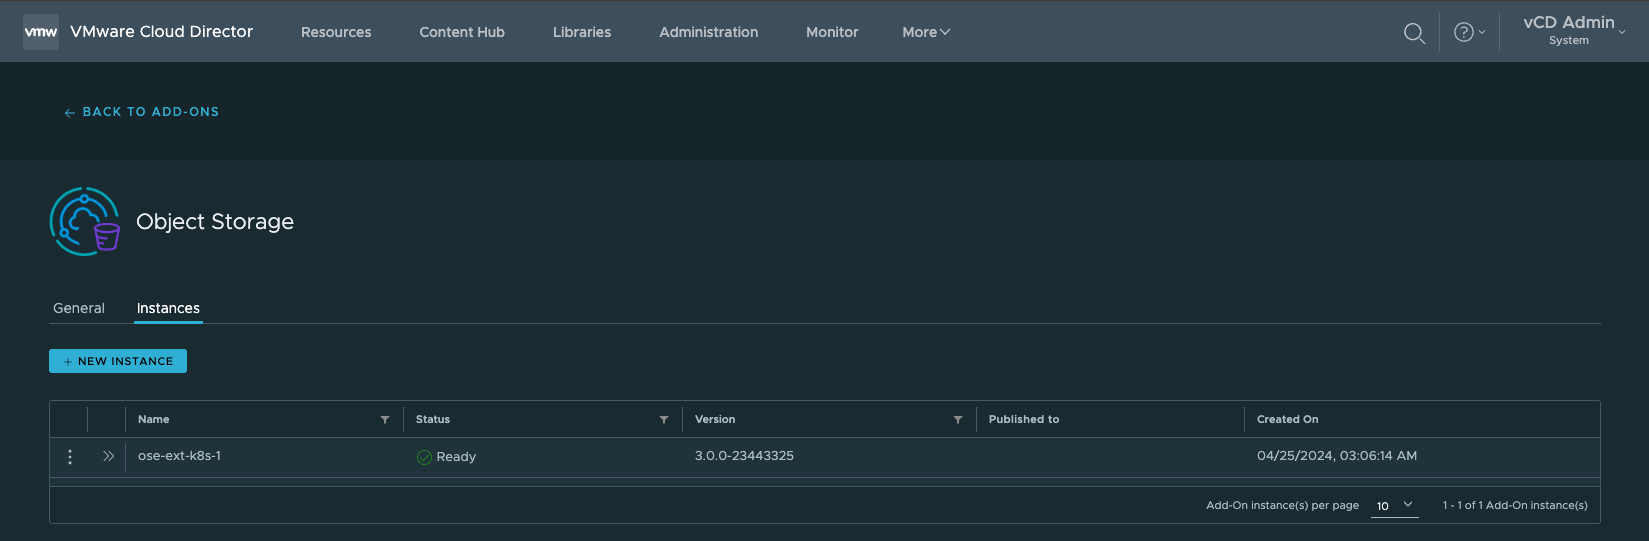
openssl s_client -connect esxi-host:443 </dev/null 2>/dev/null | openssl x509 -outform PEM > esxi_host.pem13. Once the OSE Solution-Add has been successfully deployed and installed, the status should = ✓ Ready
¶ Configuring the Object Storage Extension
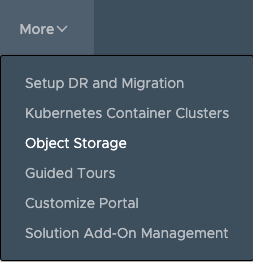
1. Select More > Object Storage Extension
2. In the Object Storage Extension, you will need to input the configuration parameters. Select CONFIGURE:

¶ Install an Ingress Controller in Kubernetes
It's required that the Kubernetes Cluster has an ingress controller and a LoadBalancer service deployed. I used the Contour as the deployment was straightforward.
Run the following to install Contour:
kubectl apply -f https://projectcontour.io/quickstart/contour.yamlVerify the Contour pods are ready by running the following:
kubectl get pods -n projectcontour -o wideYou should see the following:
- 2 Contour pods each with status Running and 1/1 Ready
- 1+ Envoy pod(s), each with the status Running and 2/2 Ready
NAME                            READY   STATUS      RESTARTS   AGE   IP            NODE           NOMINATED NODE   READINESS GATES
contour-76985ff686-6ldfn        1/1     Running     0          44s   10.244.0.74   k8s-template   <none>           <none>
contour-76985ff686-vgznh        1/1     Running     0          44s   10.244.0.75   k8s-template   <none>           <none>
contour-certgen-v1-28-3-7zgs9   0/1     Completed   0          44s   10.244.0.73   k8s-template   <none>           <none>
envoy-6xpv9 2/2 Running 0 44s 10.244.0.76 k8s-template <none> <none>¶ Install Cert Manager
It's required that the Kubernetes Cluster has Cert Manager installed to process and orchestrate self-signed certificates.
Kubernetes Cert Manager Installation
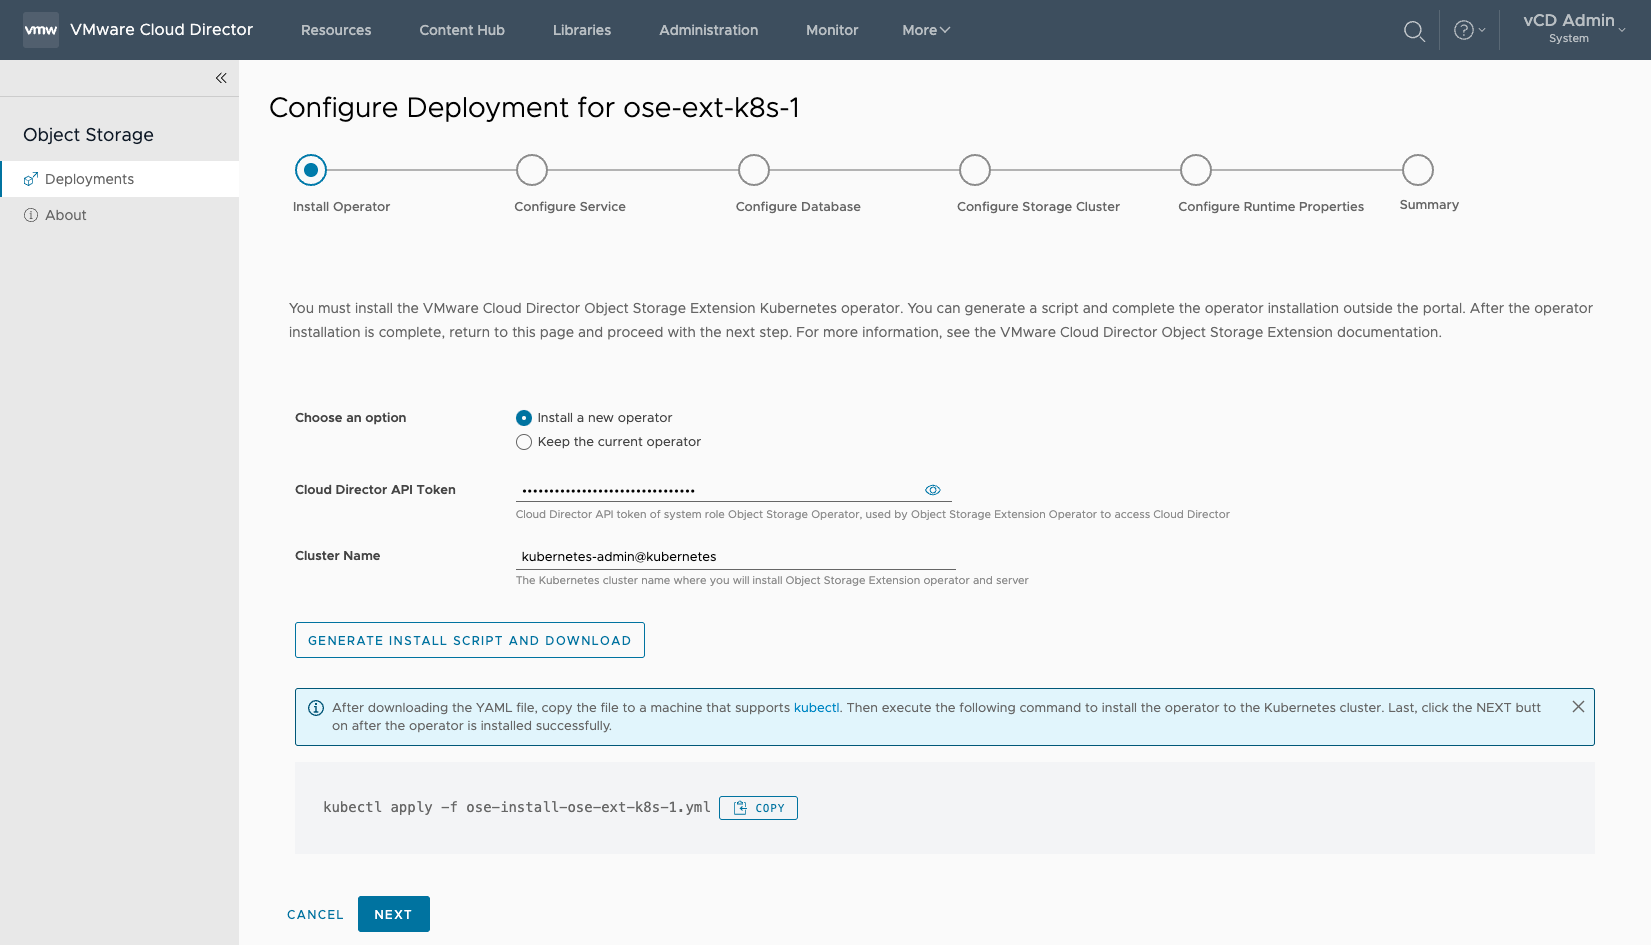
kubectl apply -f https://github.com/cert-manager/cert-manager/releases/download/v1.14.5/cert-manager.yaml¶ Install Operator
1. In the Configure Deployment wizard, select and input the following parameters.
- Select Install a new operator
- Cloud Director API Token
- Cluster Name
2. Select GENERATE INSTALL SCRIPT AND DOWNLOAD
- Download the YAML file and
scpit to the Kubernetes cluster - After downloading the YAML file, copy the file to a machine that supports kubectl.
- Then execute the following command to install the operator to the Kubernetes cluster. Last, click the NEXT button after the operator is installed successfully.
kubectl apply -f ose-install-ose-ext-k8s-1.yml3. Install the Kubernetes Operator
kubectl apply -f ose-install-ose-ext-k8s-1.yml
namespace/vcd-ose created
serviceaccount/vcd-ose-controller-manager created
role.rbac.authorization.k8s.io/vcd-ose-leader-election-role created
clusterrole.rbac.authorization.k8s.io/vcd-ose-manager-role created                                                                                                                                                      │
clusterrole.rbac.authorization.k8s.io/vcd-ose-metrics-reader created                                                                                                                                                    │
clusterrole.rbac.authorization.k8s.io/vcd-ose-proxy-role created                                                                                                                                                        │
rolebinding.rbac.authorization.k8s.io/vcd-ose-leader-election-rolebinding created                                                                                                                                       │
clusterrolebinding.rbac.authorization.k8s.io/vcd-ose-manager-rolebinding created                                                                                                                                        │
clusterrolebinding.rbac.authorization.k8s.io/vcd-ose-proxy-rolebinding created                                                                                                                                          │
configmap/vcd-ose-manager-config created                                                                                                                                                                                │
secret/vcd-ose-image-creds created                                                                                                                                                                                      │
secret/vcd-ose-vcd-creds created                                                                                                                                                                                        │
service/vcd-ose-controller-manager-metrics-service created                                                                                                                                                              │
deployment.apps/vcd-ose-controller-manager created4. Ensure that the pods are running:
kubectl get pods --namespace=vcd-ose
kubectl get pods --namespace=vcd-ose
NAME                                          READY   STATUS    RESTARTS   AGE
vcd-ose-controller-manager-6698749cd4-mn5w5   2/2     Running   0          17m
vcd-ose-controller-manager-6698749cd4-t64fj 2/2 Running 0 17m5. Click NEXT
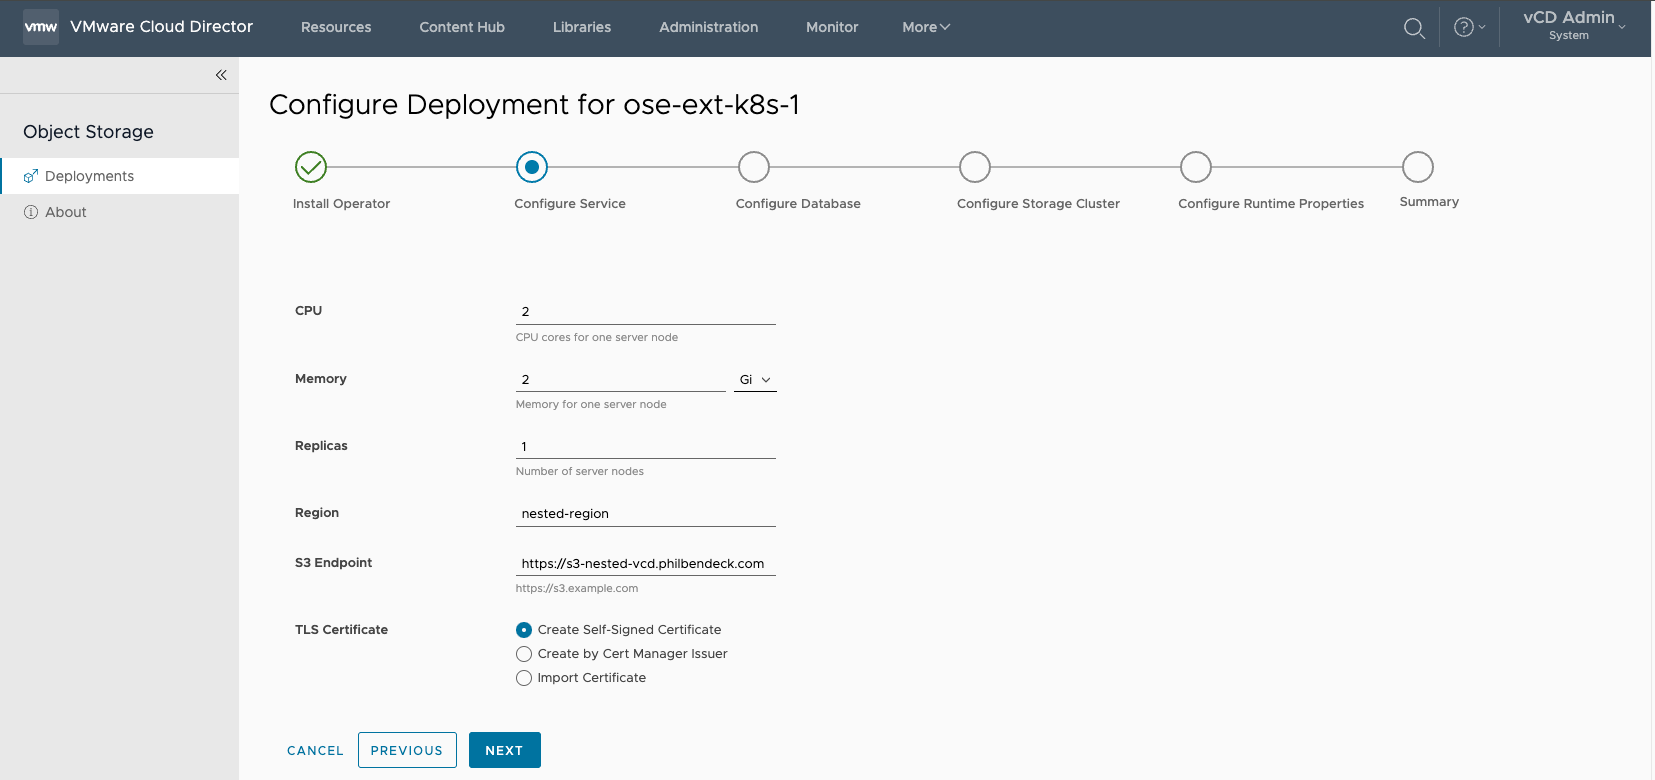
¶ Configure Service
1. API Token Name
2. CPU (2 by default)
3. Memory (2 Gi by default)
4. Replicas
5. Region
- Must match the Cloudian HyperStore Region Name
6. S3 Endpoint
7. TLS Certificate
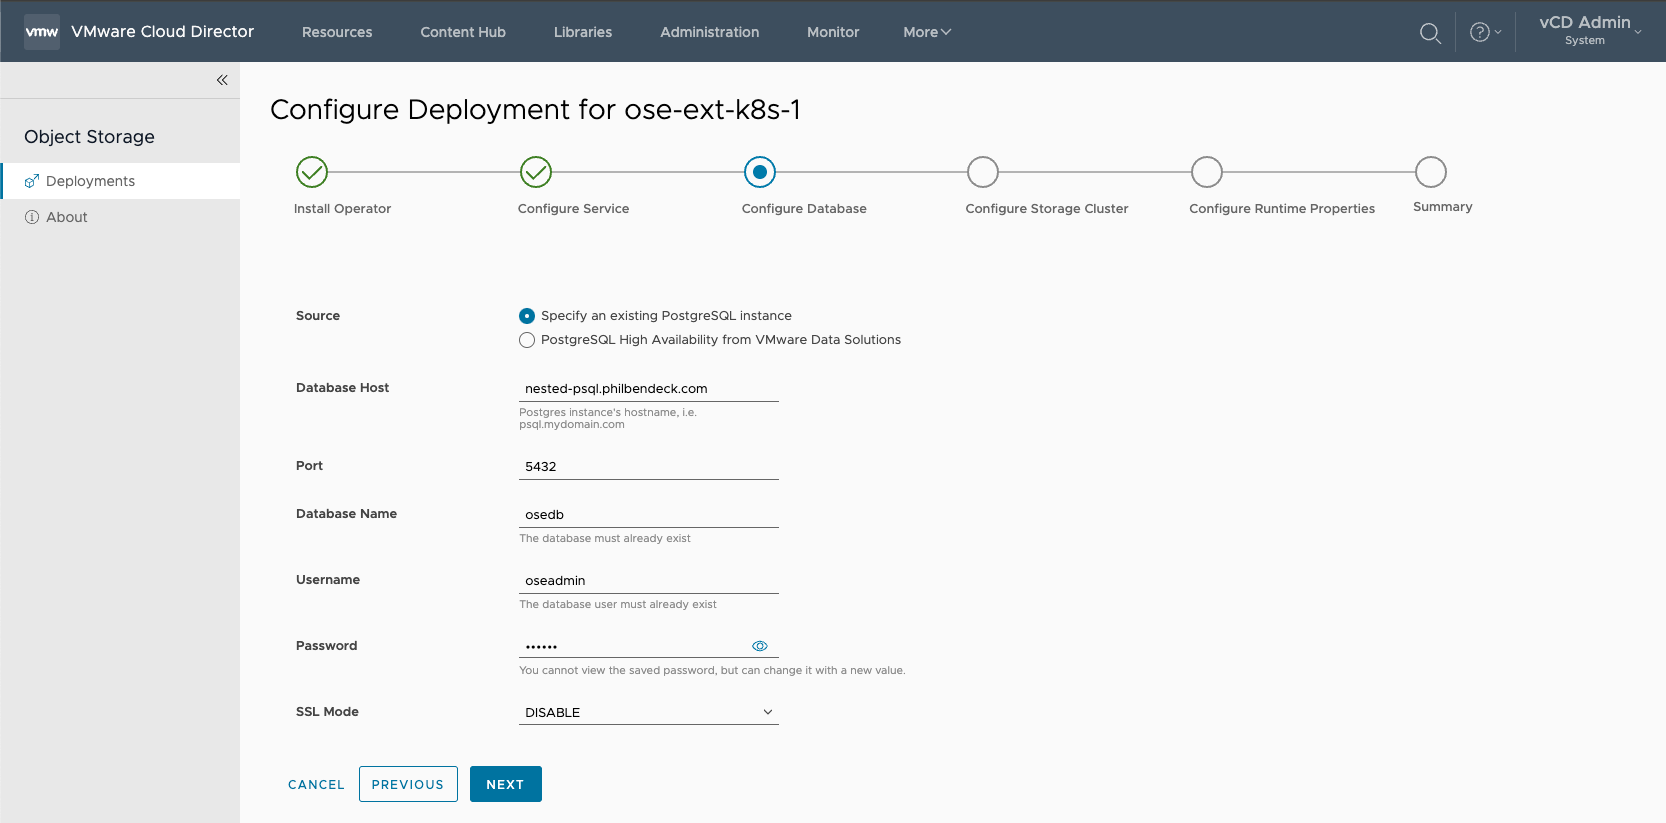
¶ Configure Database
Note: The OSE Extension supports the following PostgreSQL DB sources:
- Specify an existing PostgreSQL instance
- PostgreSQL High Availability from VMware Data Solutions
In this deployment, I have elected to use an external PostgreSQL DB.
¶ Configure Storage Cluster
Note: The OSE Extension supports the following Object Storage Platforms:
- Amazon S3
- Cloudian Hyperstore
- Dell ECS
- OSIS (Object Storage Interoperability Service)
In this deployment, I'm leveraging Cloudian Hyperstore
- For the Cloudian Hyperstore Prerequisites – Cloudian HyperStore - VMware vCloud Director Object Storage Extension Configuration Guide
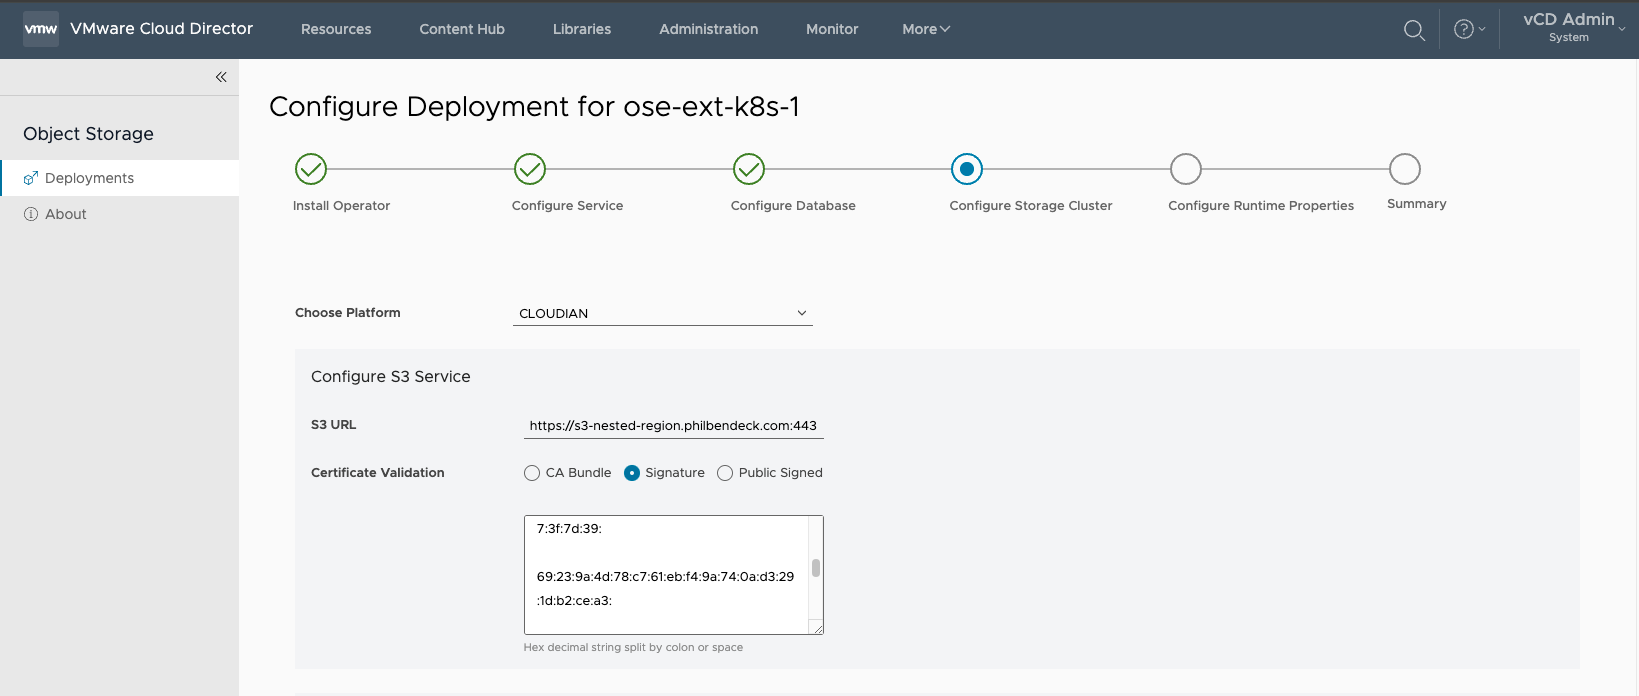
1. Choose the platform (CLOUDIAN)
2. Configure S3 Service
- Default SSL Service Port:
443
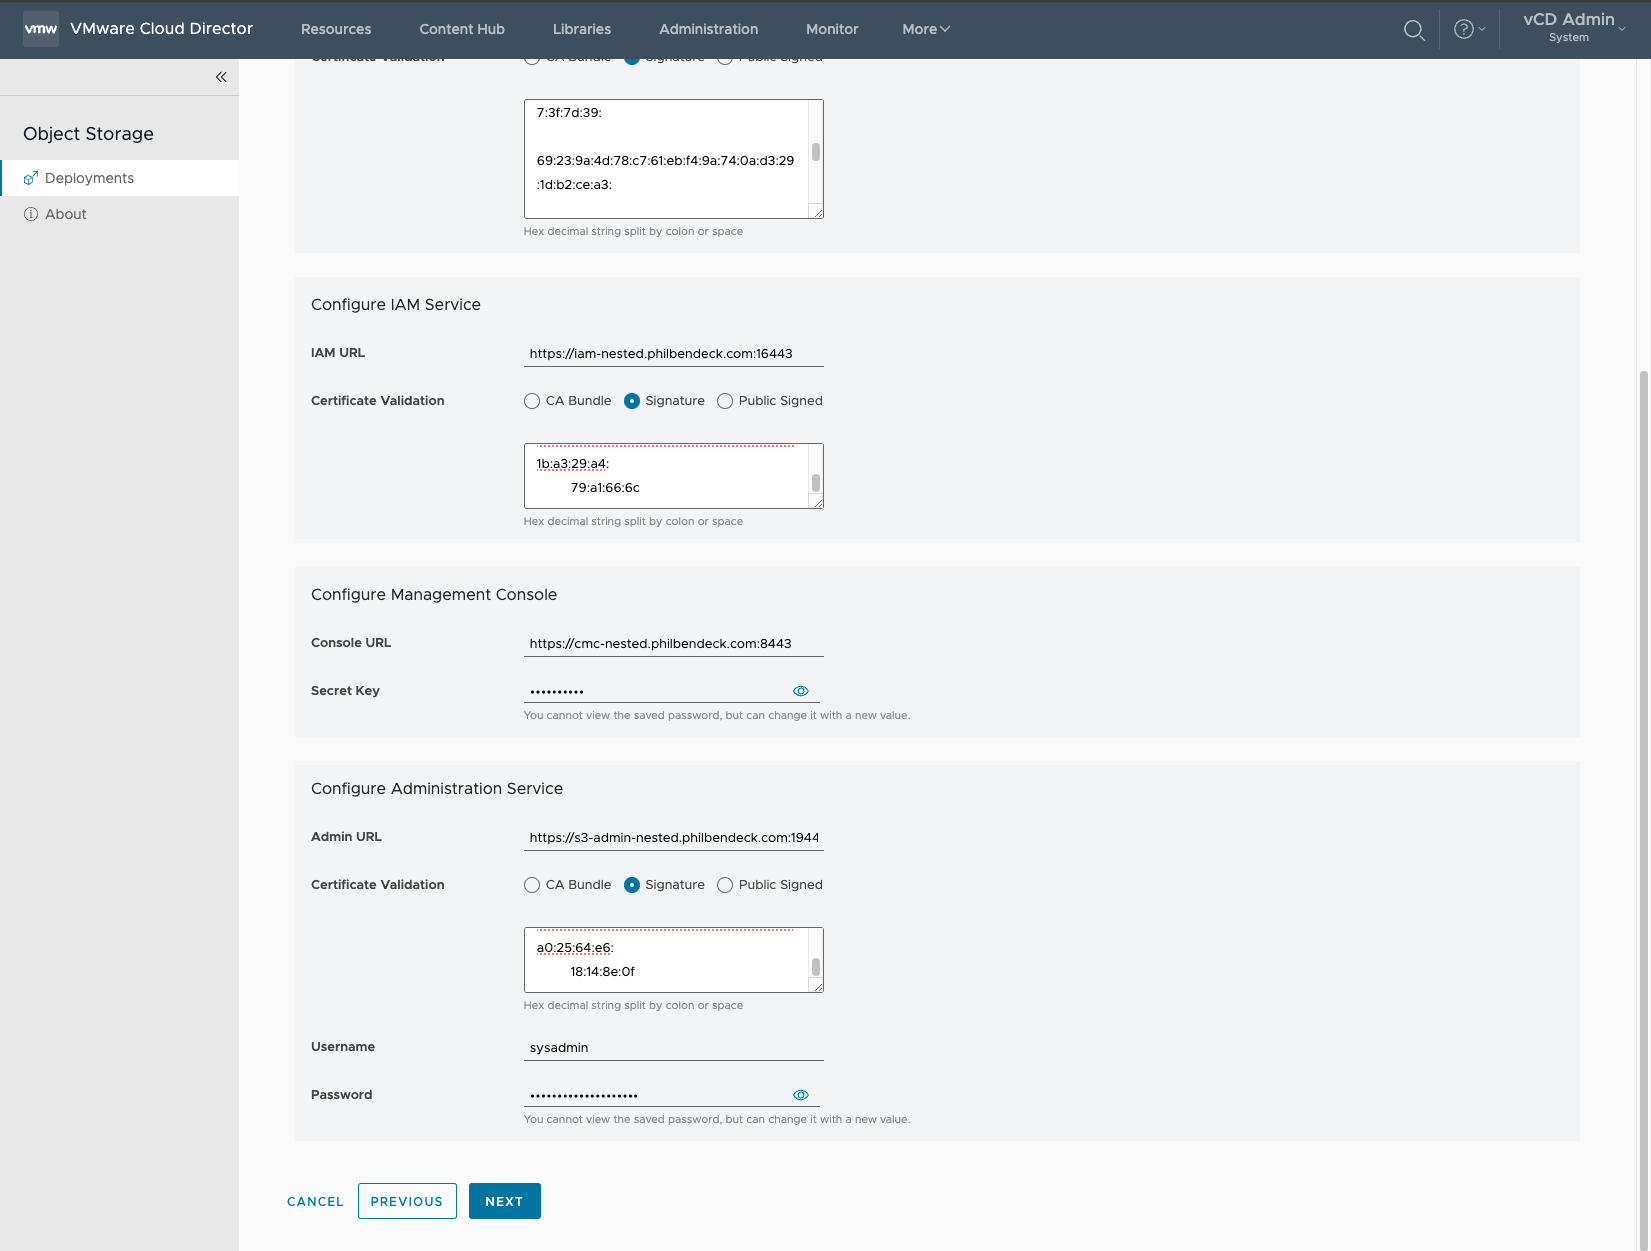
3. Configure IAM Service
- Default Service Port:
16443
4. Configure Management Console
- Default SSL Service Port:
8443
5. Configure Administration Service
- Default SSL Service Port:
19443 - Username:
sysadmin - Password: S3 Admin API Password
hsctl config get admin.auth.password¶ Method to Retrieve the SSL Signature Algorithm
#!/bin/bash

read -p "Enter the FQDN of the DNS record: " fqdn
read -p "Enter the port for $fqdn: " port

echo | openssl s_client -showcerts -servername $fqdn -connect $fqdn:$port 2>/dev/null | openssl x509 -inform pem -noout -text
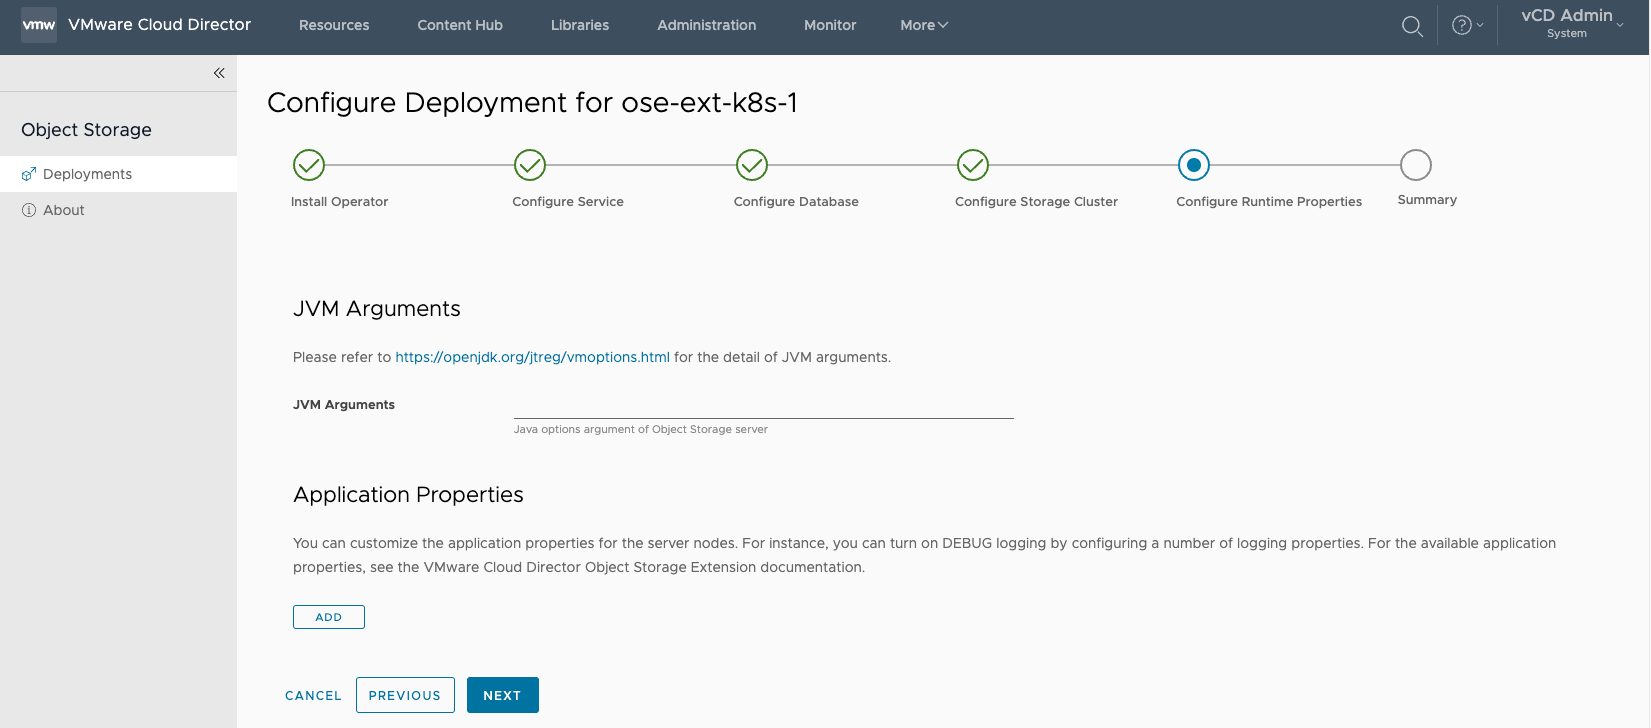
¶ Configure Runtime Properties
The Configure Runtime Properties is optional.
For a list of the configurable Applications Properties:
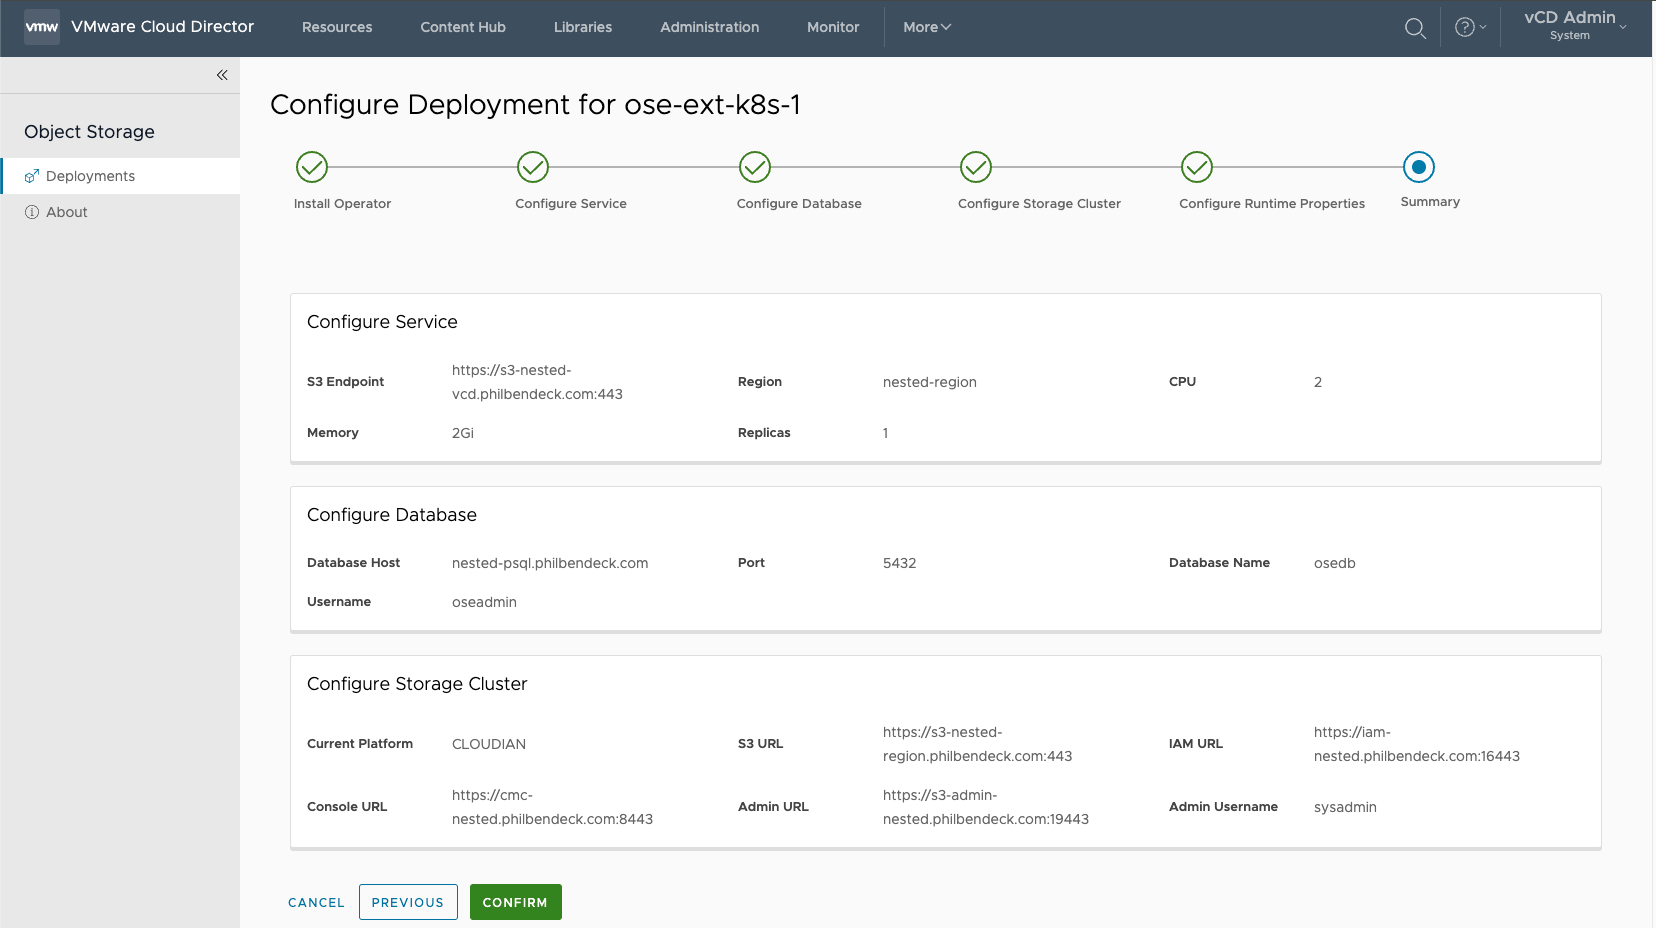
¶ Summary
Note – It's important that all the parameters are correct, before proceeding. Select CONFIRM to execute the installation.
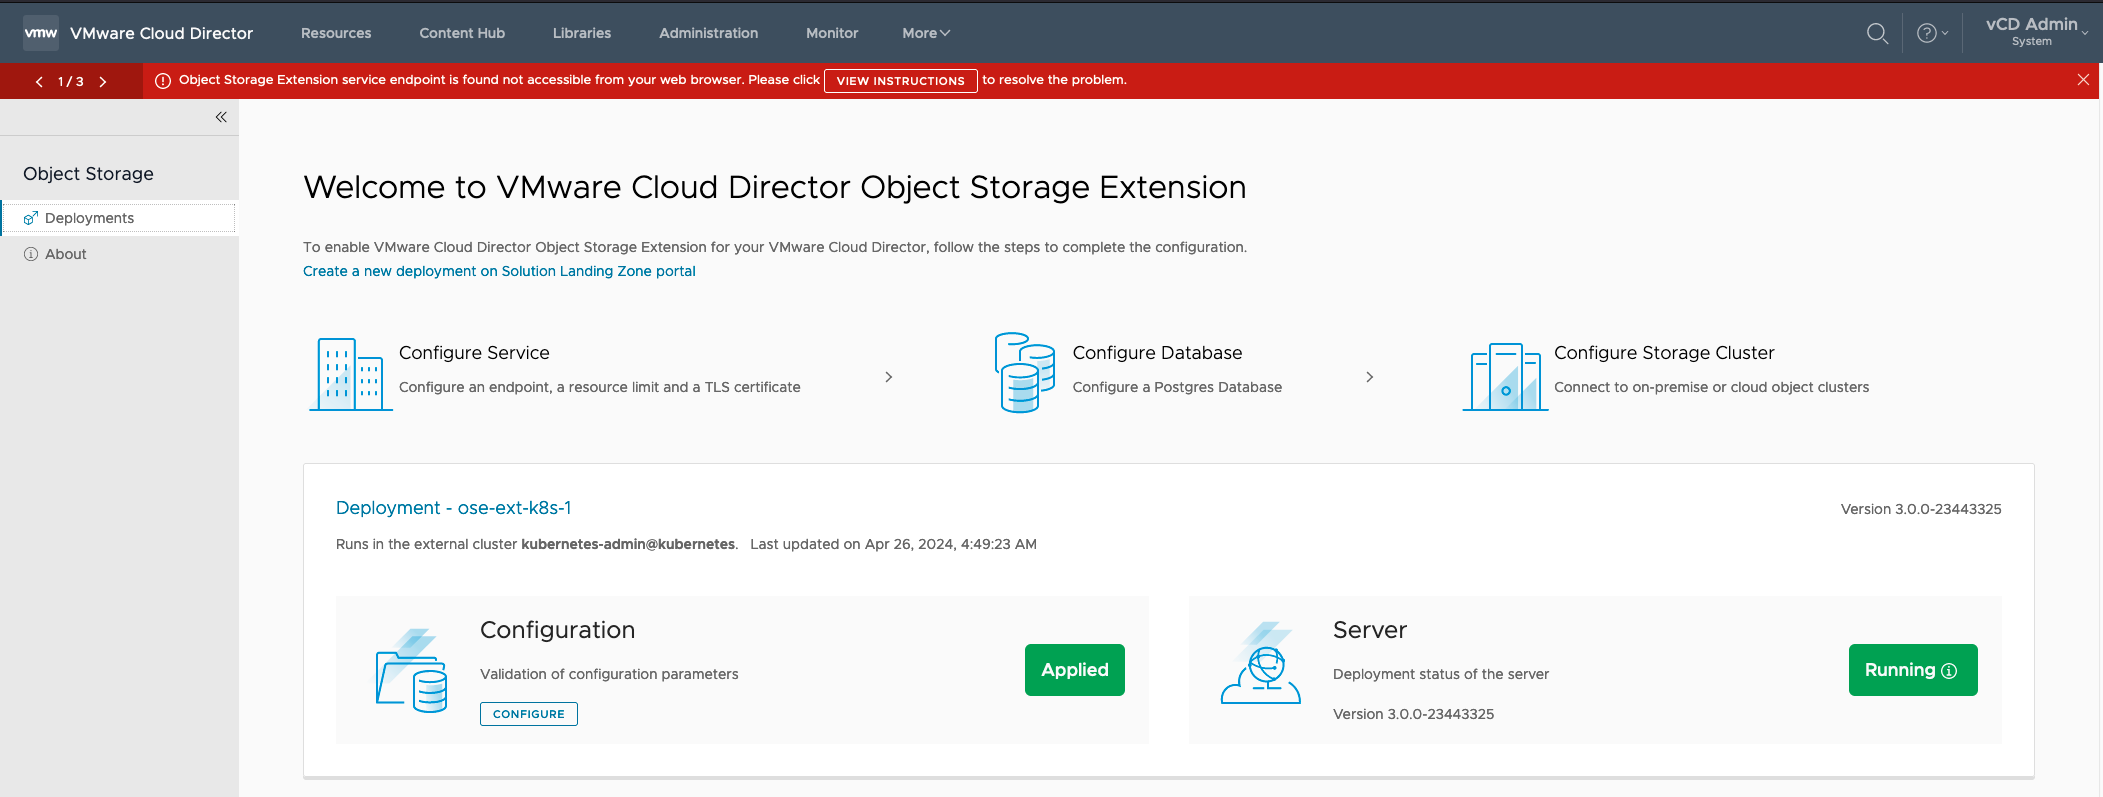
¶ Deployment Configuration
Once the installer script finalizes the deployment, the OSE UI will illustrate the Configuration has been Applied and that the Server is Running
To check the pods:
kubectl get pods -n vcd-ose
NAME                                                              READY   STATUS    RESTARTS        AGE
vcd-ose-controller-manager-6698749cd4-mn5w5                       2/2     Running   6 (3d10h ago)   4d7h
vcd-ose-controller-manager-6698749cd4-zv27p                       2/2     Running   0               54s
vcd-ose-server-83404f84-c680-4d33-bb38-d1e502f9d437-559f9d4pcs5 1/1 Running 0 3d9h¶ Accept the Certificate
Self-Signed Certificates will require you to accept the certificate in order to use the extension, Enable/Disable tenants, and manipulate the underlying Object Storage System.

¶ Troubleshooting
Problem Statement in Lab Environment
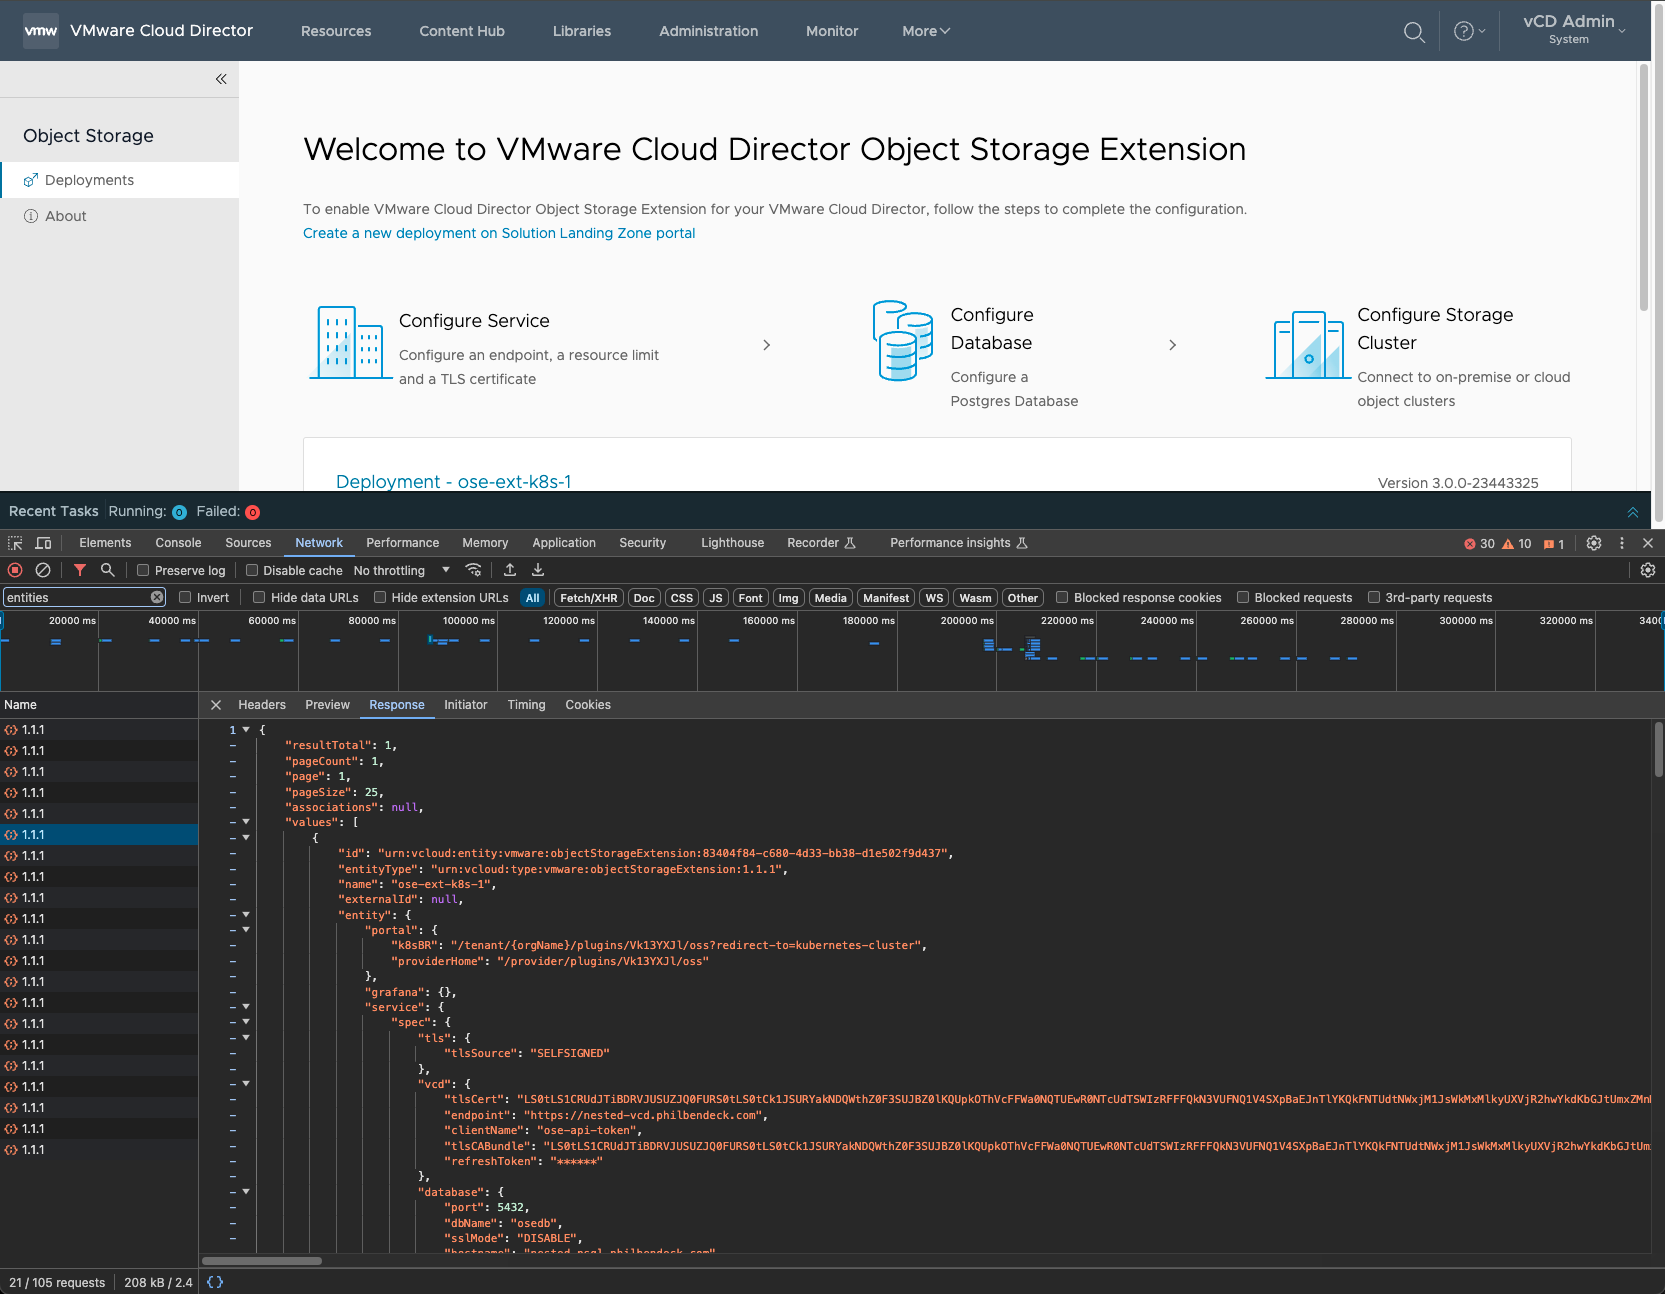
- I ran into an issue (I reported this to our engineering team), where I had to modify the Response
JSONmanually as it was invoking parameters from previous attempts. - It also caused an issue where there was an empty object in the RDE in the JSON causing the UI to error out that the storage platform type was missing.

Tip:
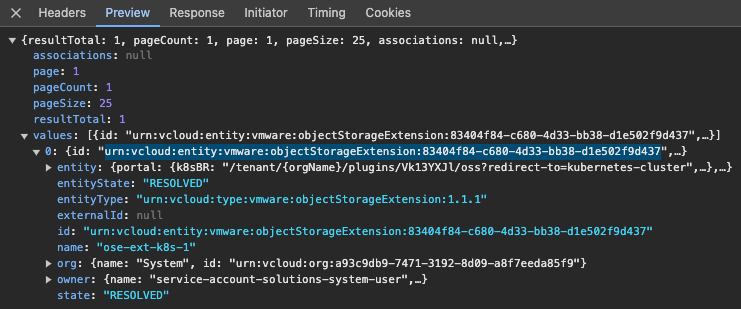
- To examine the JSON that the UI invoked, after confirming the parameters, you can inspect the Header Response
- Leveraging the
PUT/1.0.0/entities/{id}API call, I invoked an updated JSON, which allowed me to finalize the configuration.{id}=urn:vcloud:entity:vmware:objectStorageExtension:{ID}– located in the header.
- In the event, you run into this issue, open a support case , and feel free to reference this article.
- Note – the passwords will be parsed with an
*and you can retrieve them via the following call:
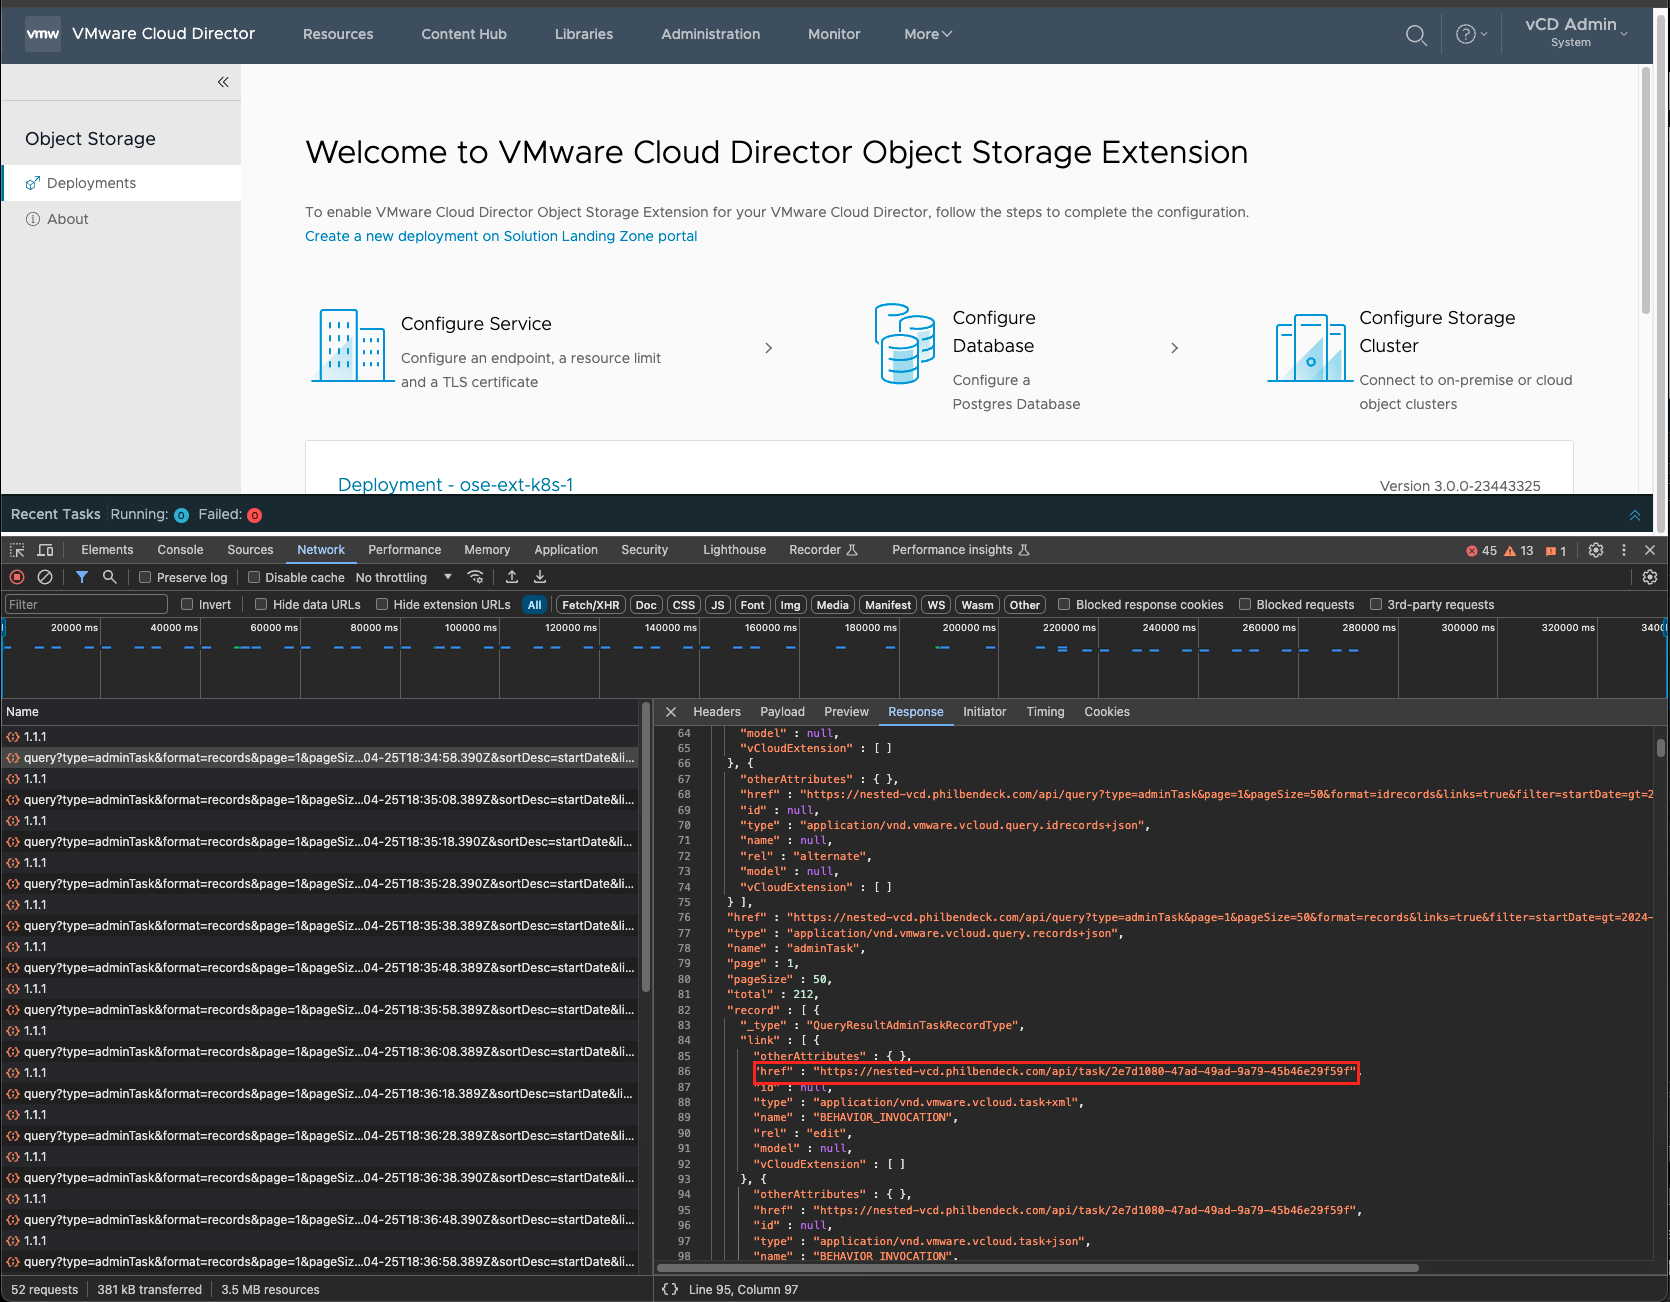
curl -X GET -k "https://VCD_FQDN/api/task/{ID}" -H "accept: application/*+xml;version=38.1" -H "Authorization: Bearer {TOKEN}
- The task
{ID}can be found in thehttps://VCD_FQDN/api/querycall.
¶ Activating a Tenant Organization
- Go to the Tenants tab, and select the tenant organization to activate.
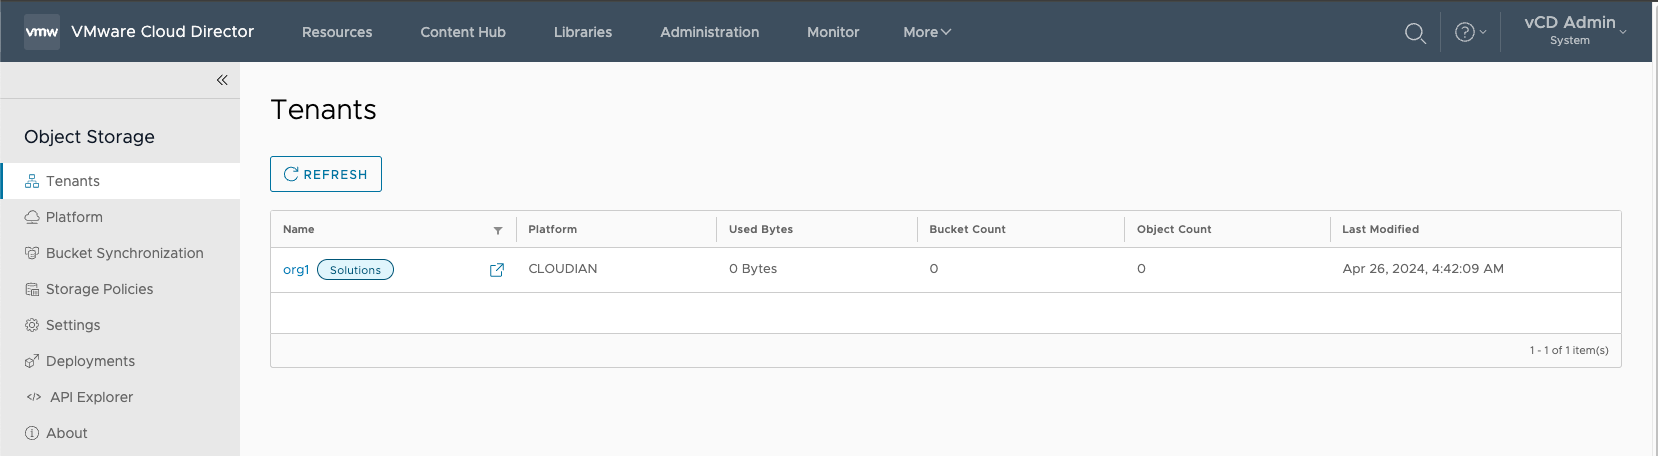
- Select Activate
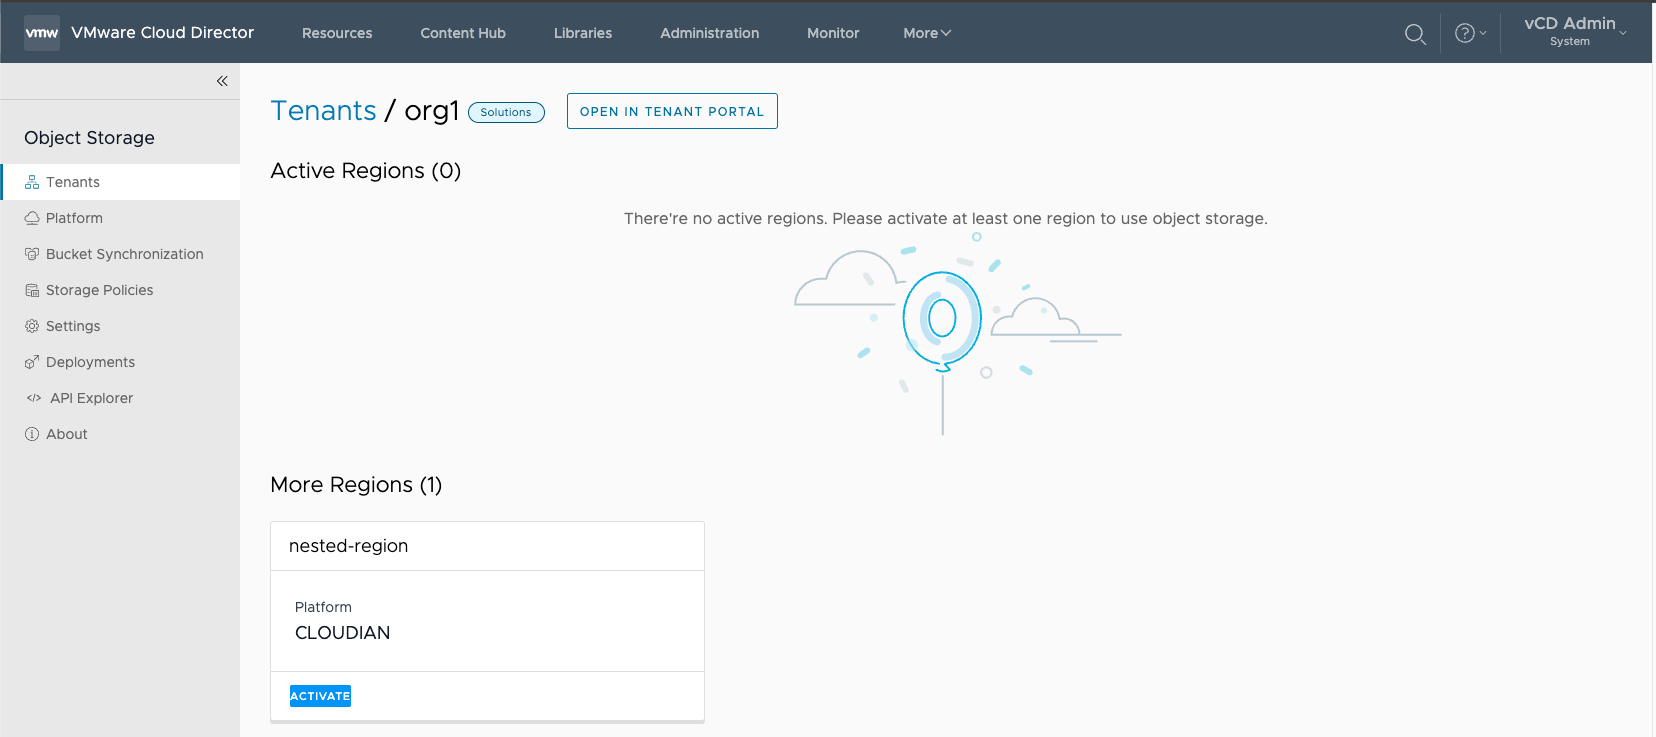
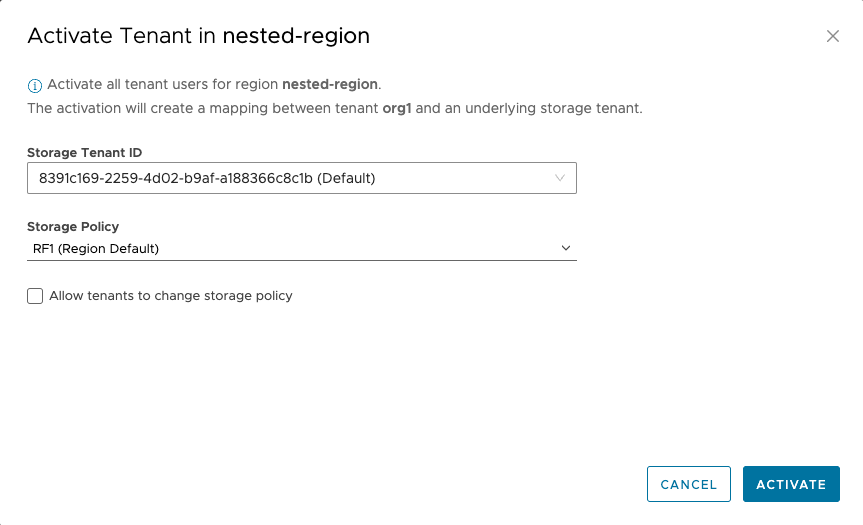
- Activate the tenant in the S3 Region
- It's not recommended to Allow tenants to change storage policies – enabled by default
- Use the default Storage Tenant ID and select the Storage Policy
- The storage policy, was previously created on HyperStore.
- OSE has the ability to create Storage Policies directly to Cloudian HyperStore as well.
- Select Activate
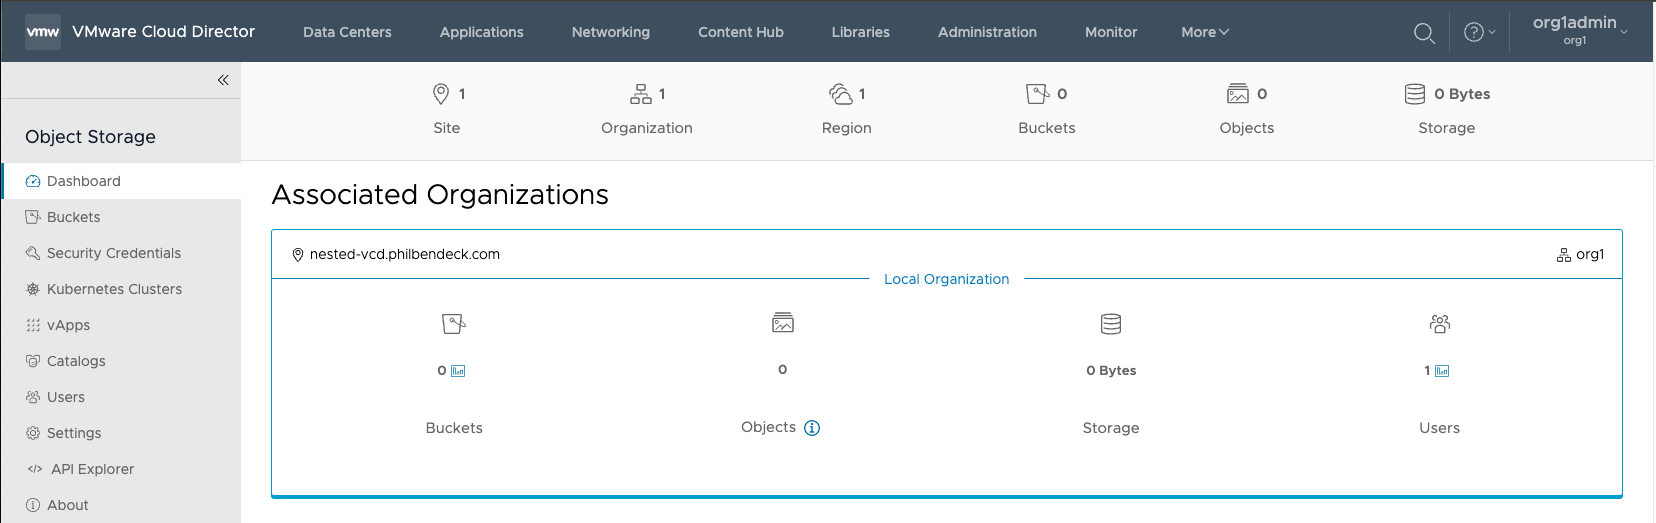
¶ Testing Tenant Access
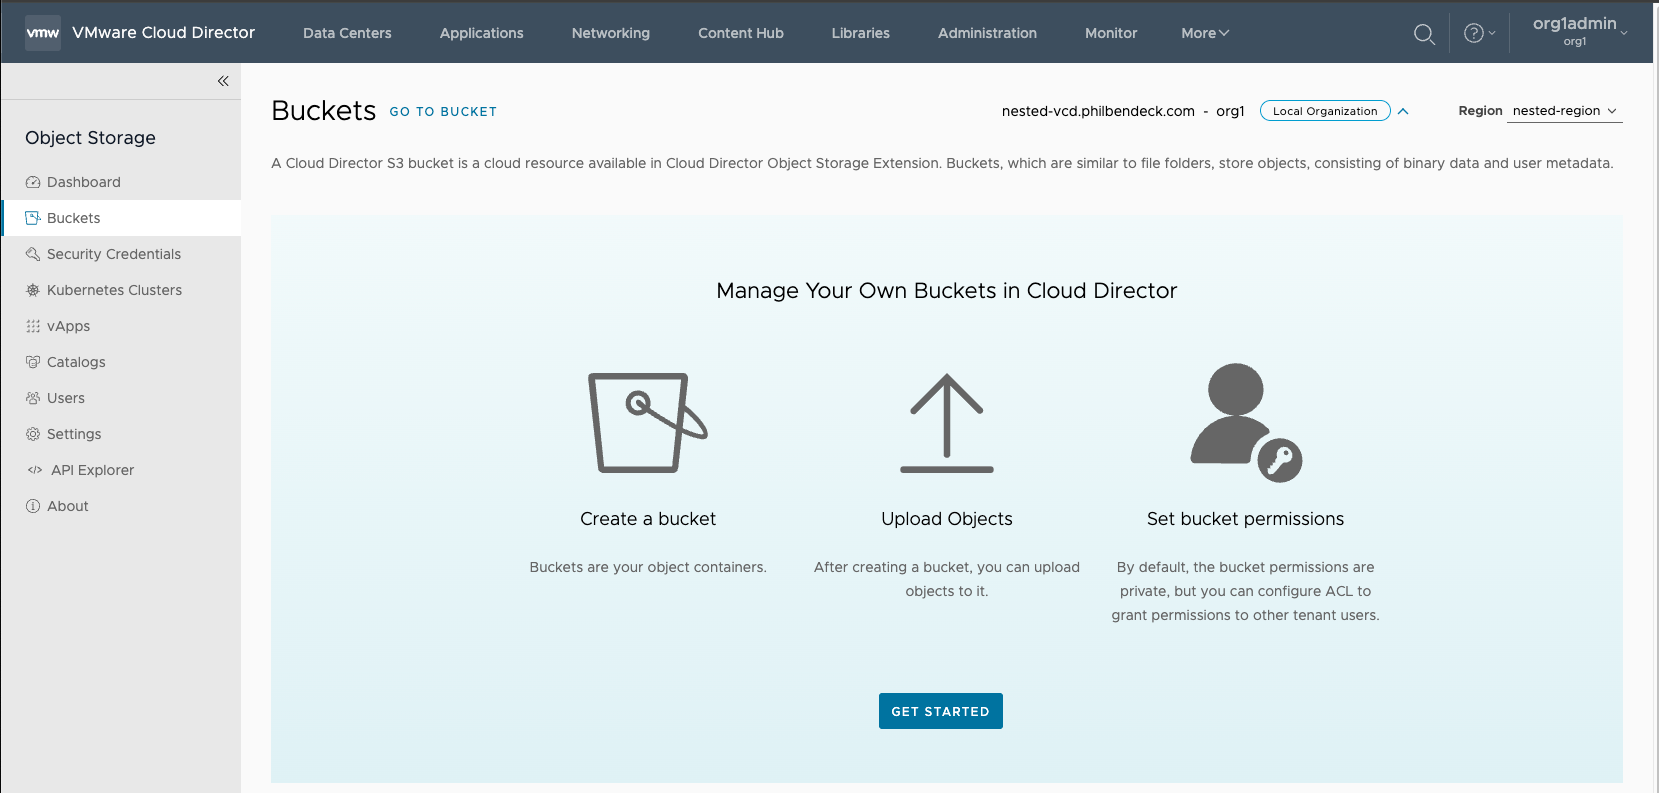
1. Login as a tenant and locate the Object Storage Extension
2. Once in the Object Storage Extension, the tenant will be presented with the Dashboard parsing all the statistics for their tenancy.
3. Select the Buckets tab, and select GET STARTED to create a bucket.
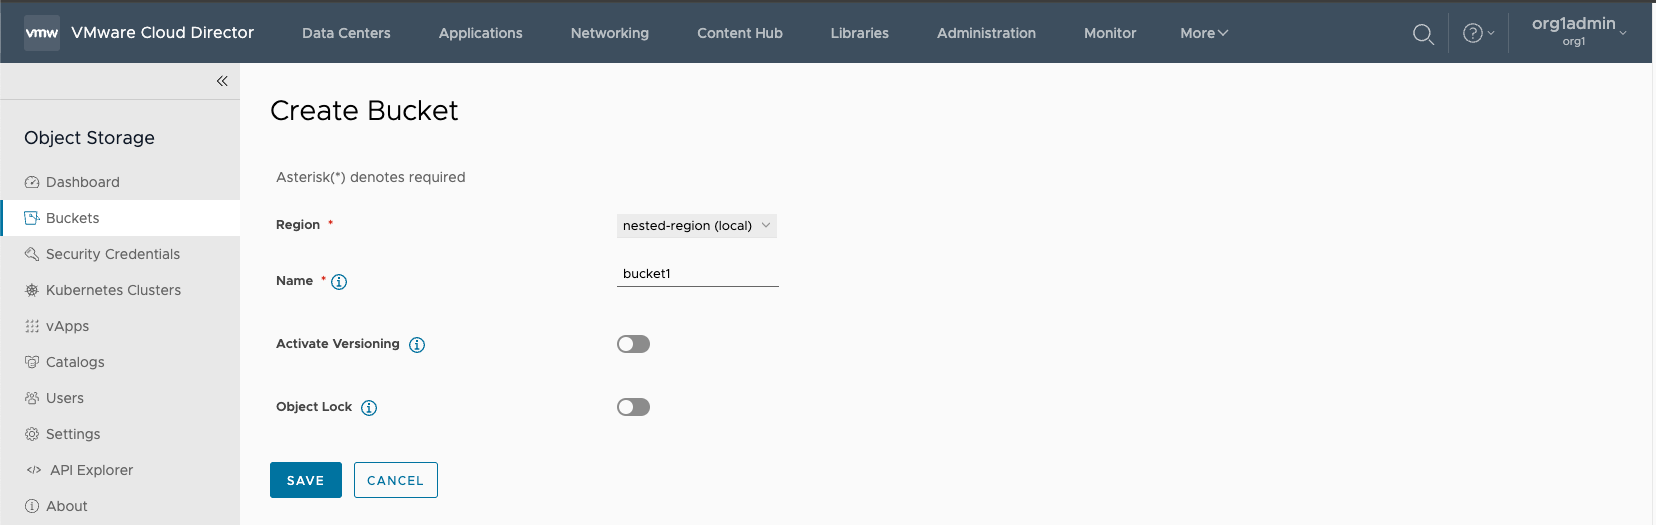
3. Create Bucket and SAVE
- Note: The Object Lock feature requires an object lock license (Compatible or Certified) that is required in order to create object lock buckets on the Cloudian HyperStore cluster.
- For more information – How to Leverage the Object Lock Service with Cloudian HyperStore and OSE
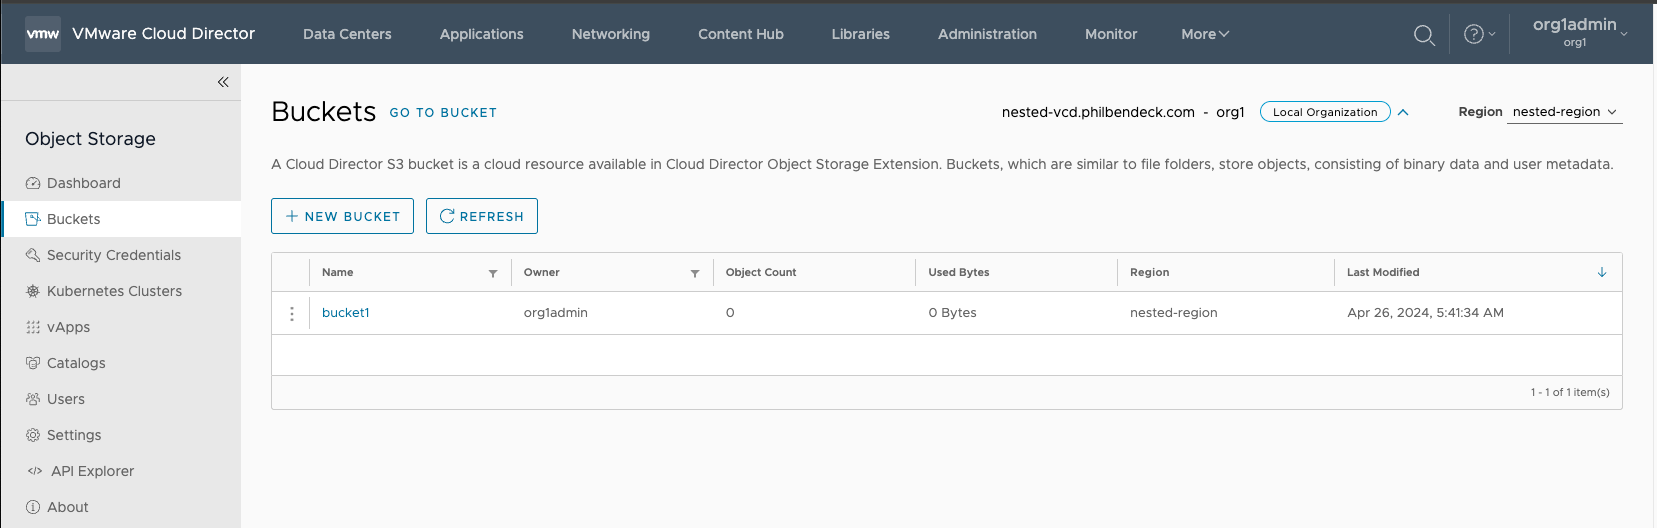
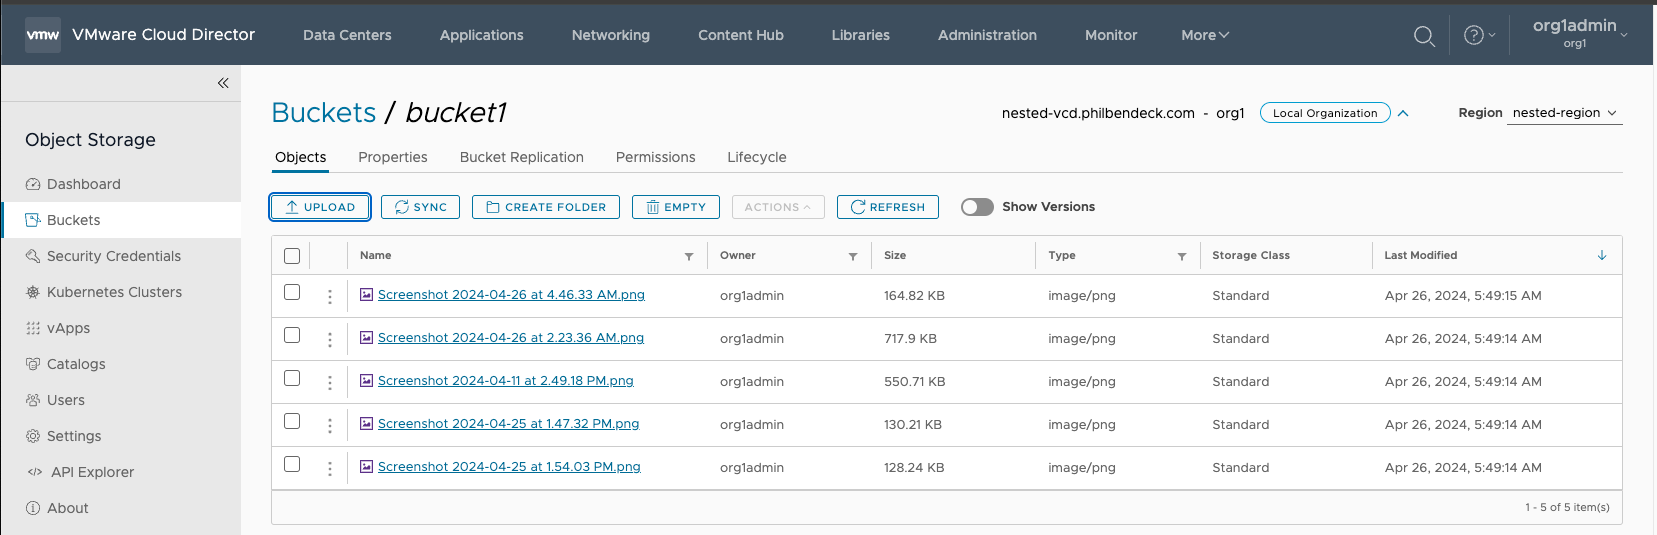
4. After the bucket has been created, the bucket will be listed as available to store objects/data.
¶ Testing Uploading Objects
1. Select the bucket to go into the bucket manipulation UI.
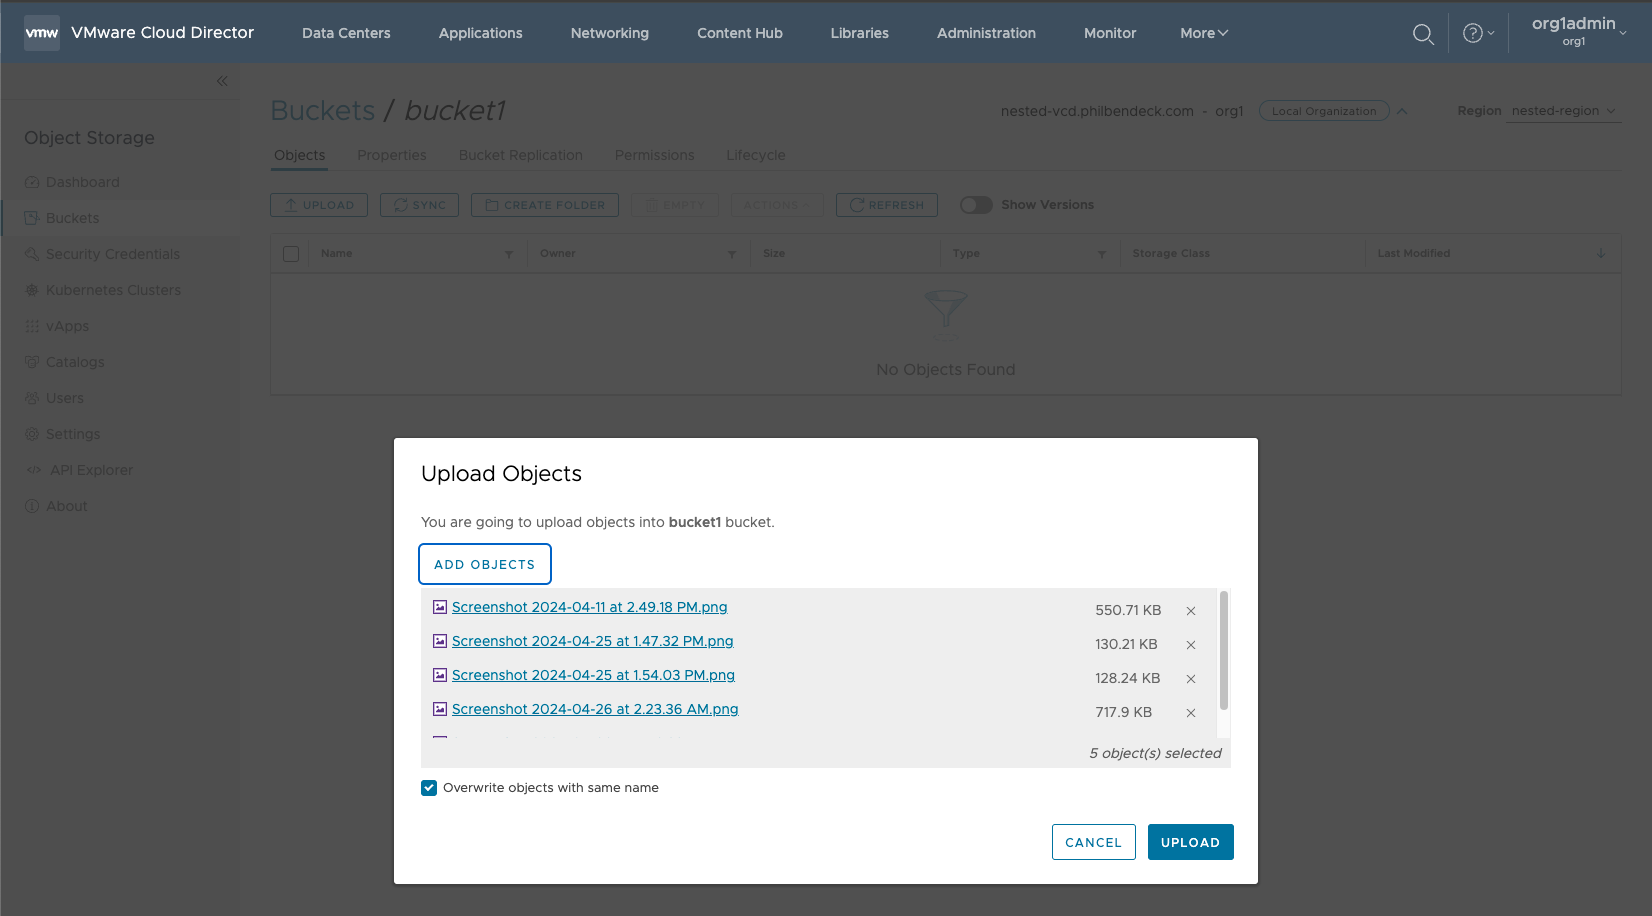
2. Select Upload to bring up the upload wizard
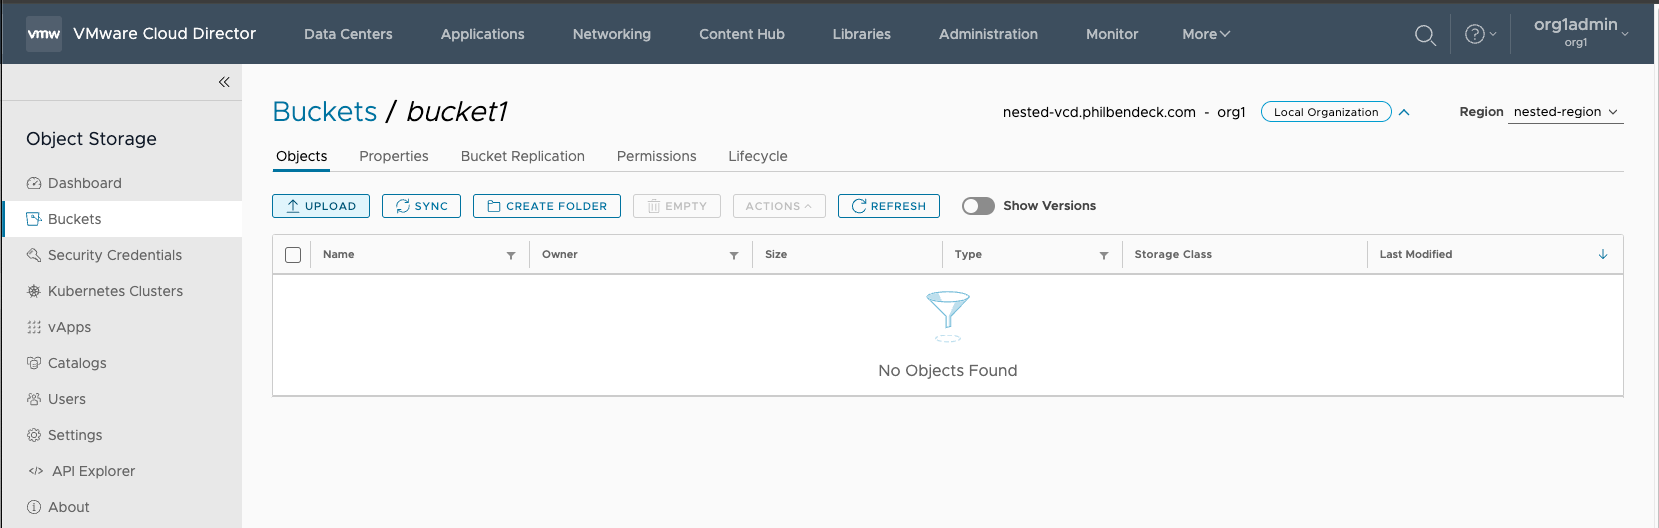
3. Select the objects from the local desktop (macOS/Windows/Linux) to upload to the bucket. Select UPLOAD
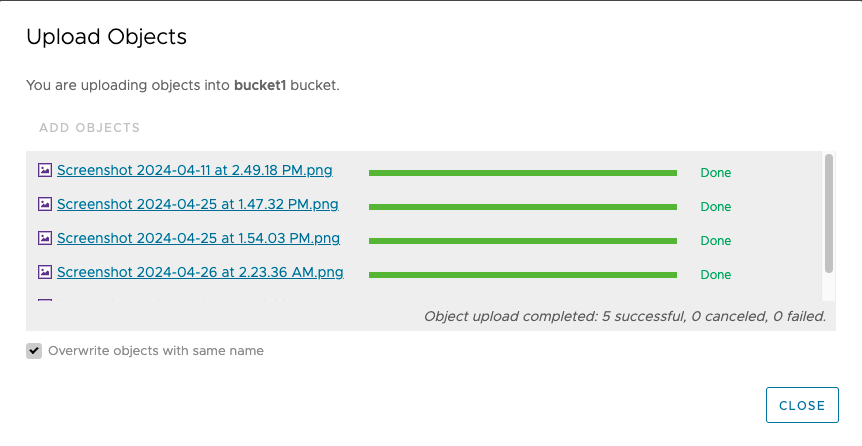
4. Ensure that the objects uploaded successfully.
¶ Using the AWS S3 CLI
Syntax
aws --profile={PROFILE}--no-verify-ssl --endpoint-url=https://{S3-ENDPOINT}:443 s3 lsExample
aws --profile=org1nested --no-verify-ssl --endpoint-url=https://s3-nested-vcd.philbendeck.com:443 s3 ls
2024-04-26 05:41:34 bucket1Syntax
aws --profile={PROFILE} --no-verify-ssl --endpoint-url=https://{S3-ENDPOINT}:443 s3 ls s3://{bucket}Example
aws --profile=org1nested --no-verify-ssl --endpoint-url=https://s3-nested-vcd.philbendeck.com:443 s3 ls s3://bucket1
2024-04-26 05:50:56     563927 Screenshot 2024-04-11 at 2.49.18 PM.png
2024-04-26 05:50:56     133332 Screenshot 2024-04-25 at 1.47.32 PM.png
2024-04-26 05:50:56     131314 Screenshot 2024-04-25 at 1.54.03 PM.png
2024-04-26 05:50:56     735134 Screenshot 2024-04-26 at 2.23.36 AM.png
2024-04-26 05:50:59     168778 Screenshot 2024-04-26 at 4.46.33 AM.png